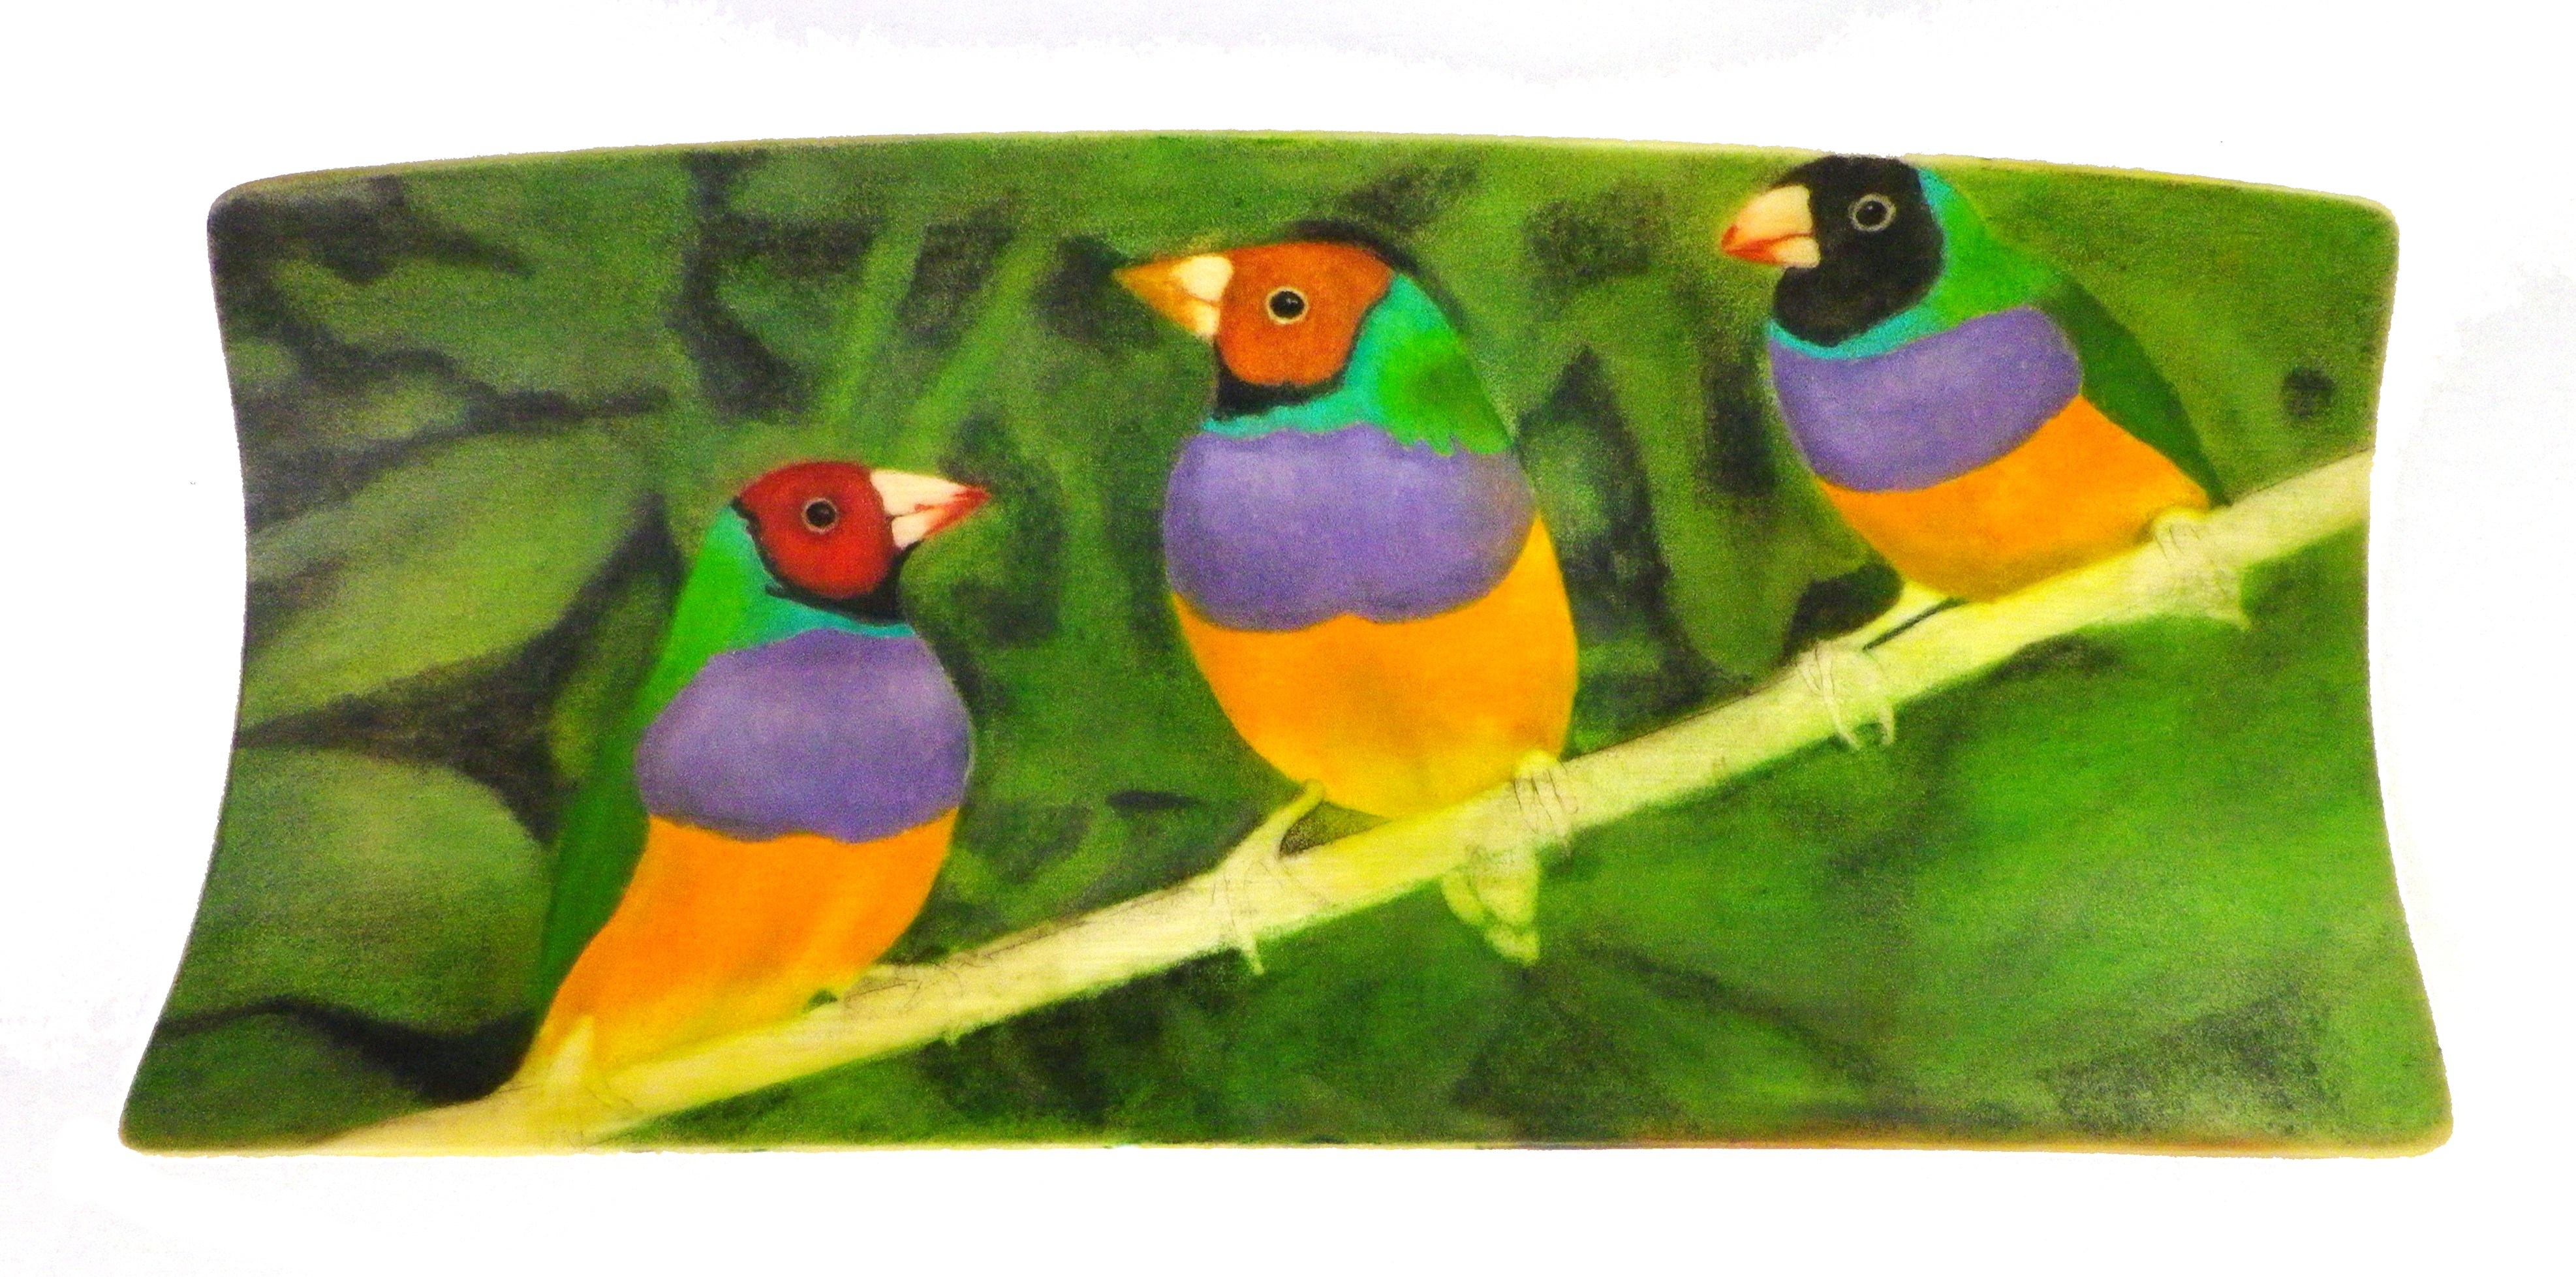
Finches Scrimshaw
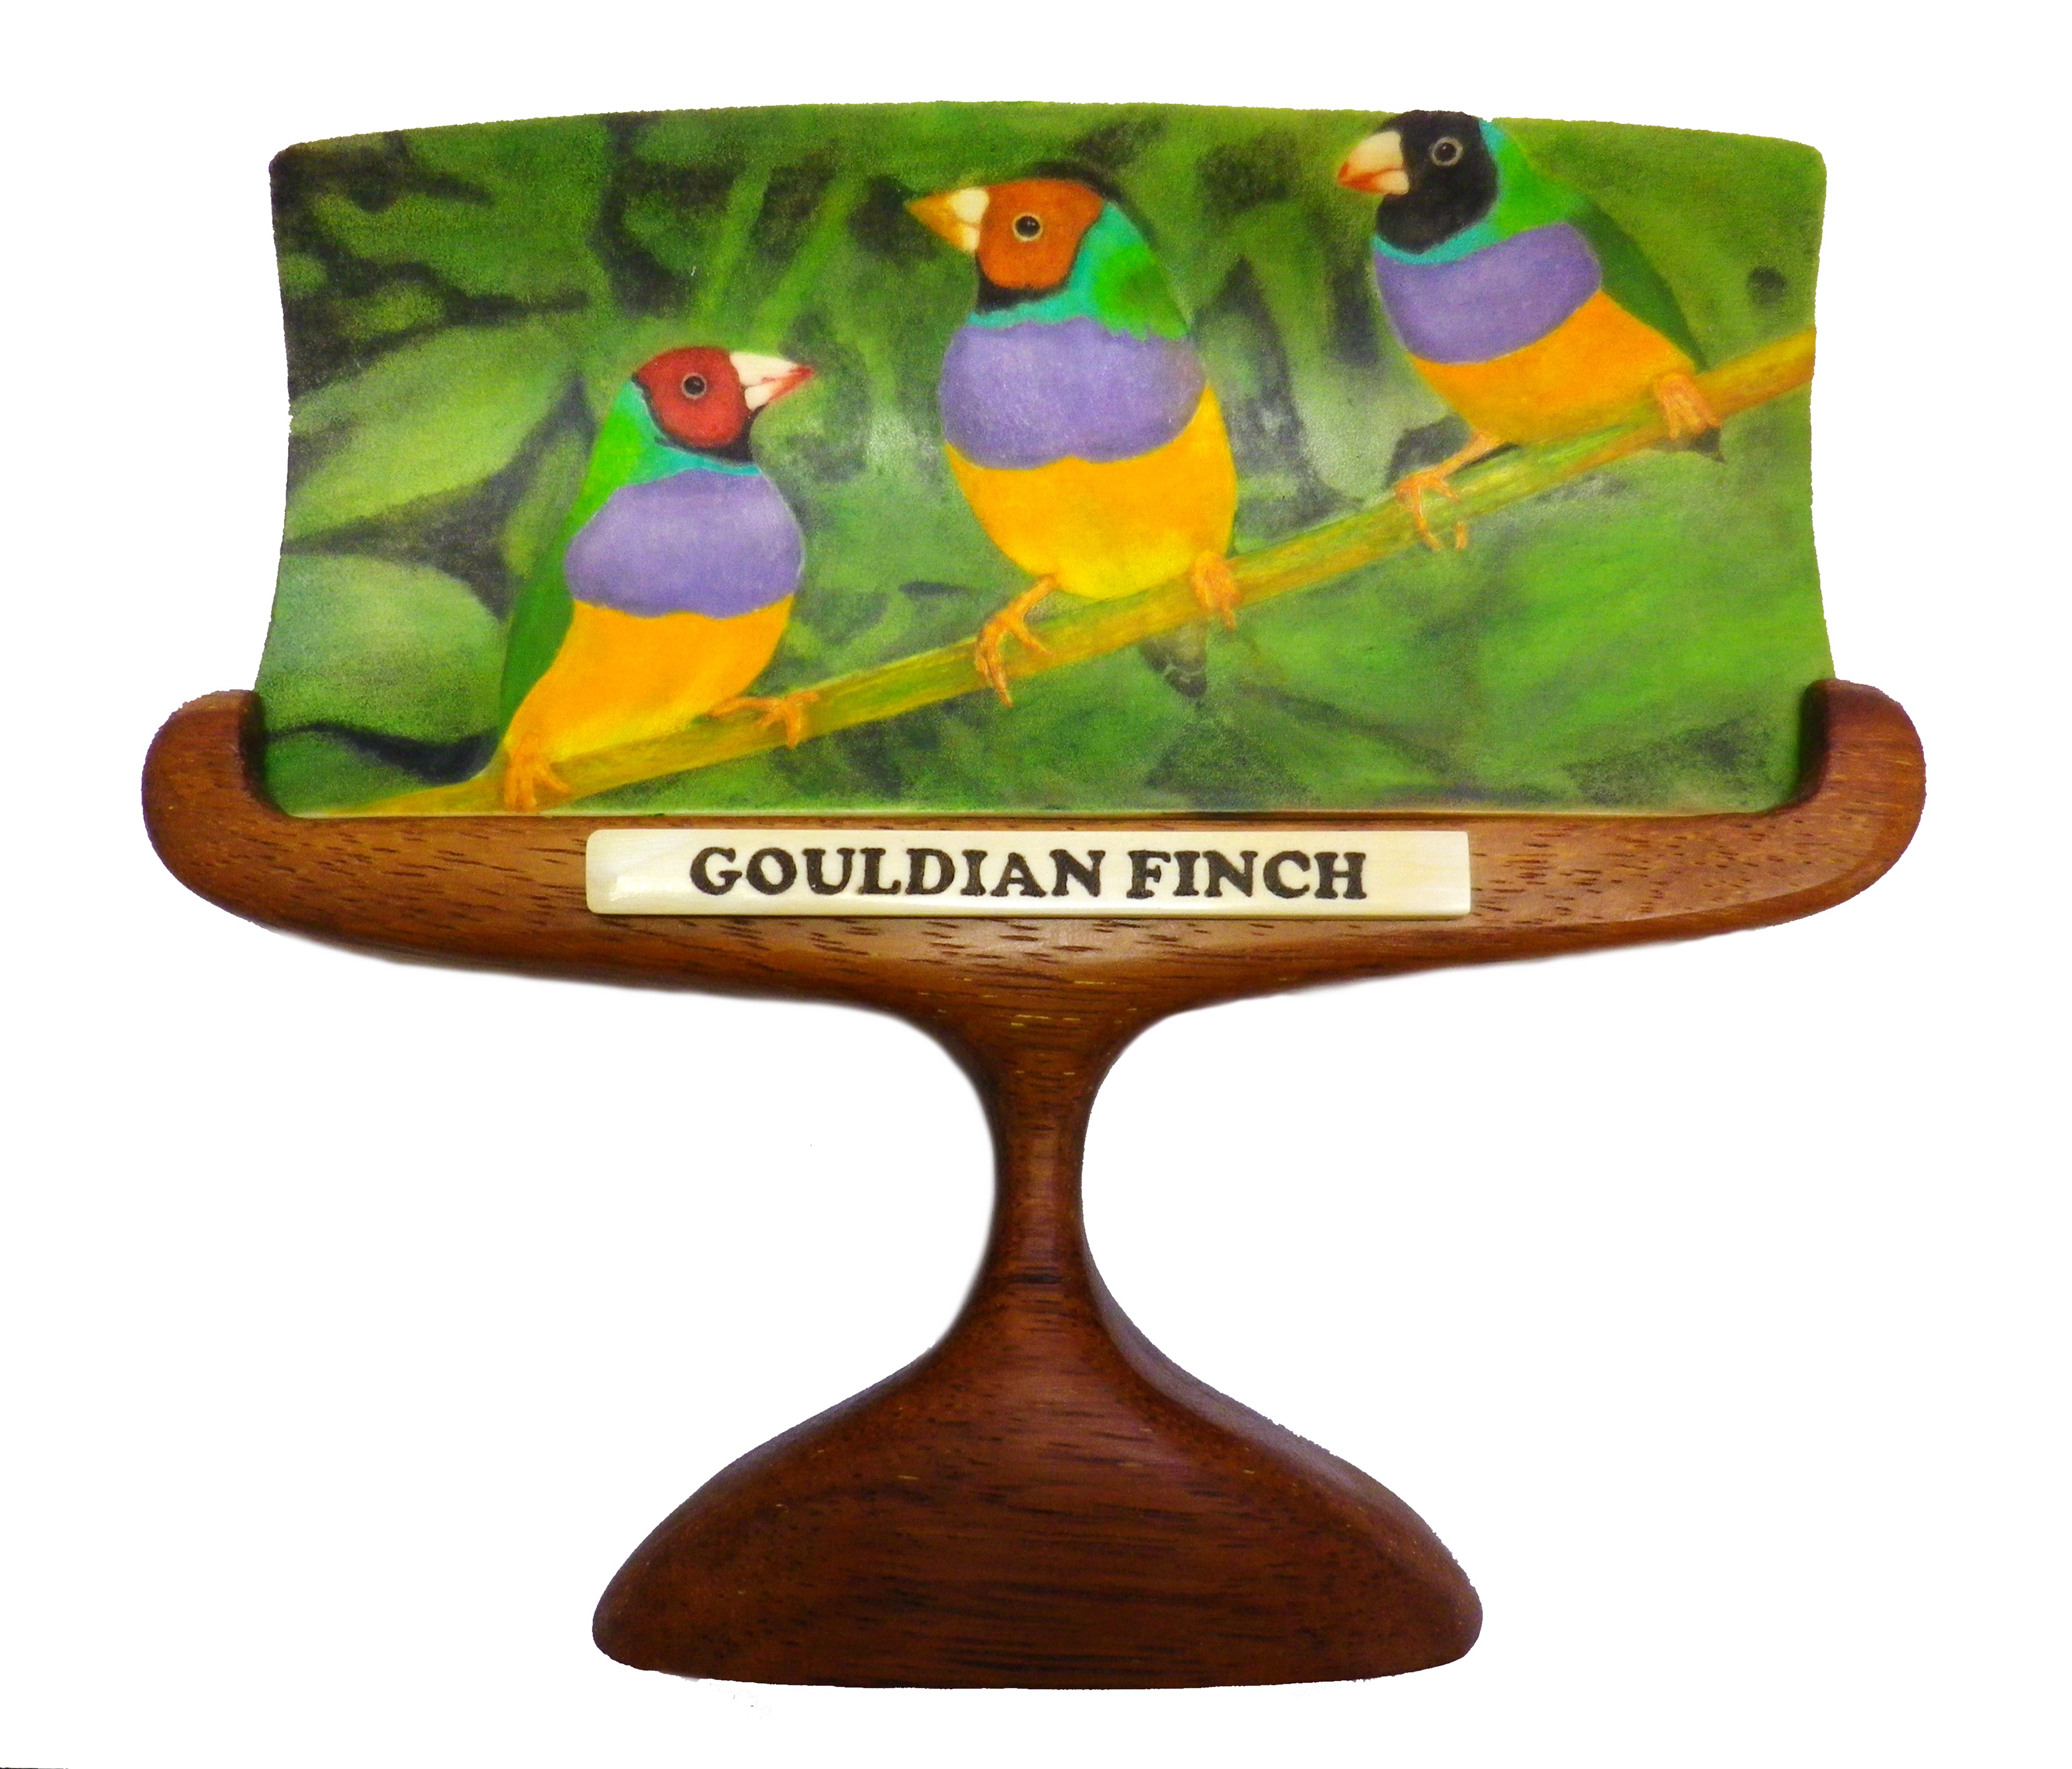
Gouldian Finches Scrimshaw Finished
This time I’ve decided to scrimshaw three Gouldian Finches because of the striking colourations.
Finches Scrimshaw Step 1 – 13/8/15
I’m using a piece of Mammoth ivory which measures 17.5cm wide x 8.5cm high (around the curve) and weighs 84 grams. The outside is too mineralised from the fossilisation process, so I’ll scrimshaw the inside of the curve. This time I’ve chosen to sandblast the entire surface then stick the picture on. Once the outline has been cut out, I’ll start to apply the oil paint. This will save a lot of time on the background.
This is what the back looks like.

Finches Scrimshaw Back of Ivory
This is the ivory after sandblasting, as outlined in the shortcuts section. I’ve covered the entire background with a light green oil paint and I’m now building up the shaded sections behind the foliage with black which should take a few days. The finches are sand blasted and untouched. I have to be careful not to get any green on them.
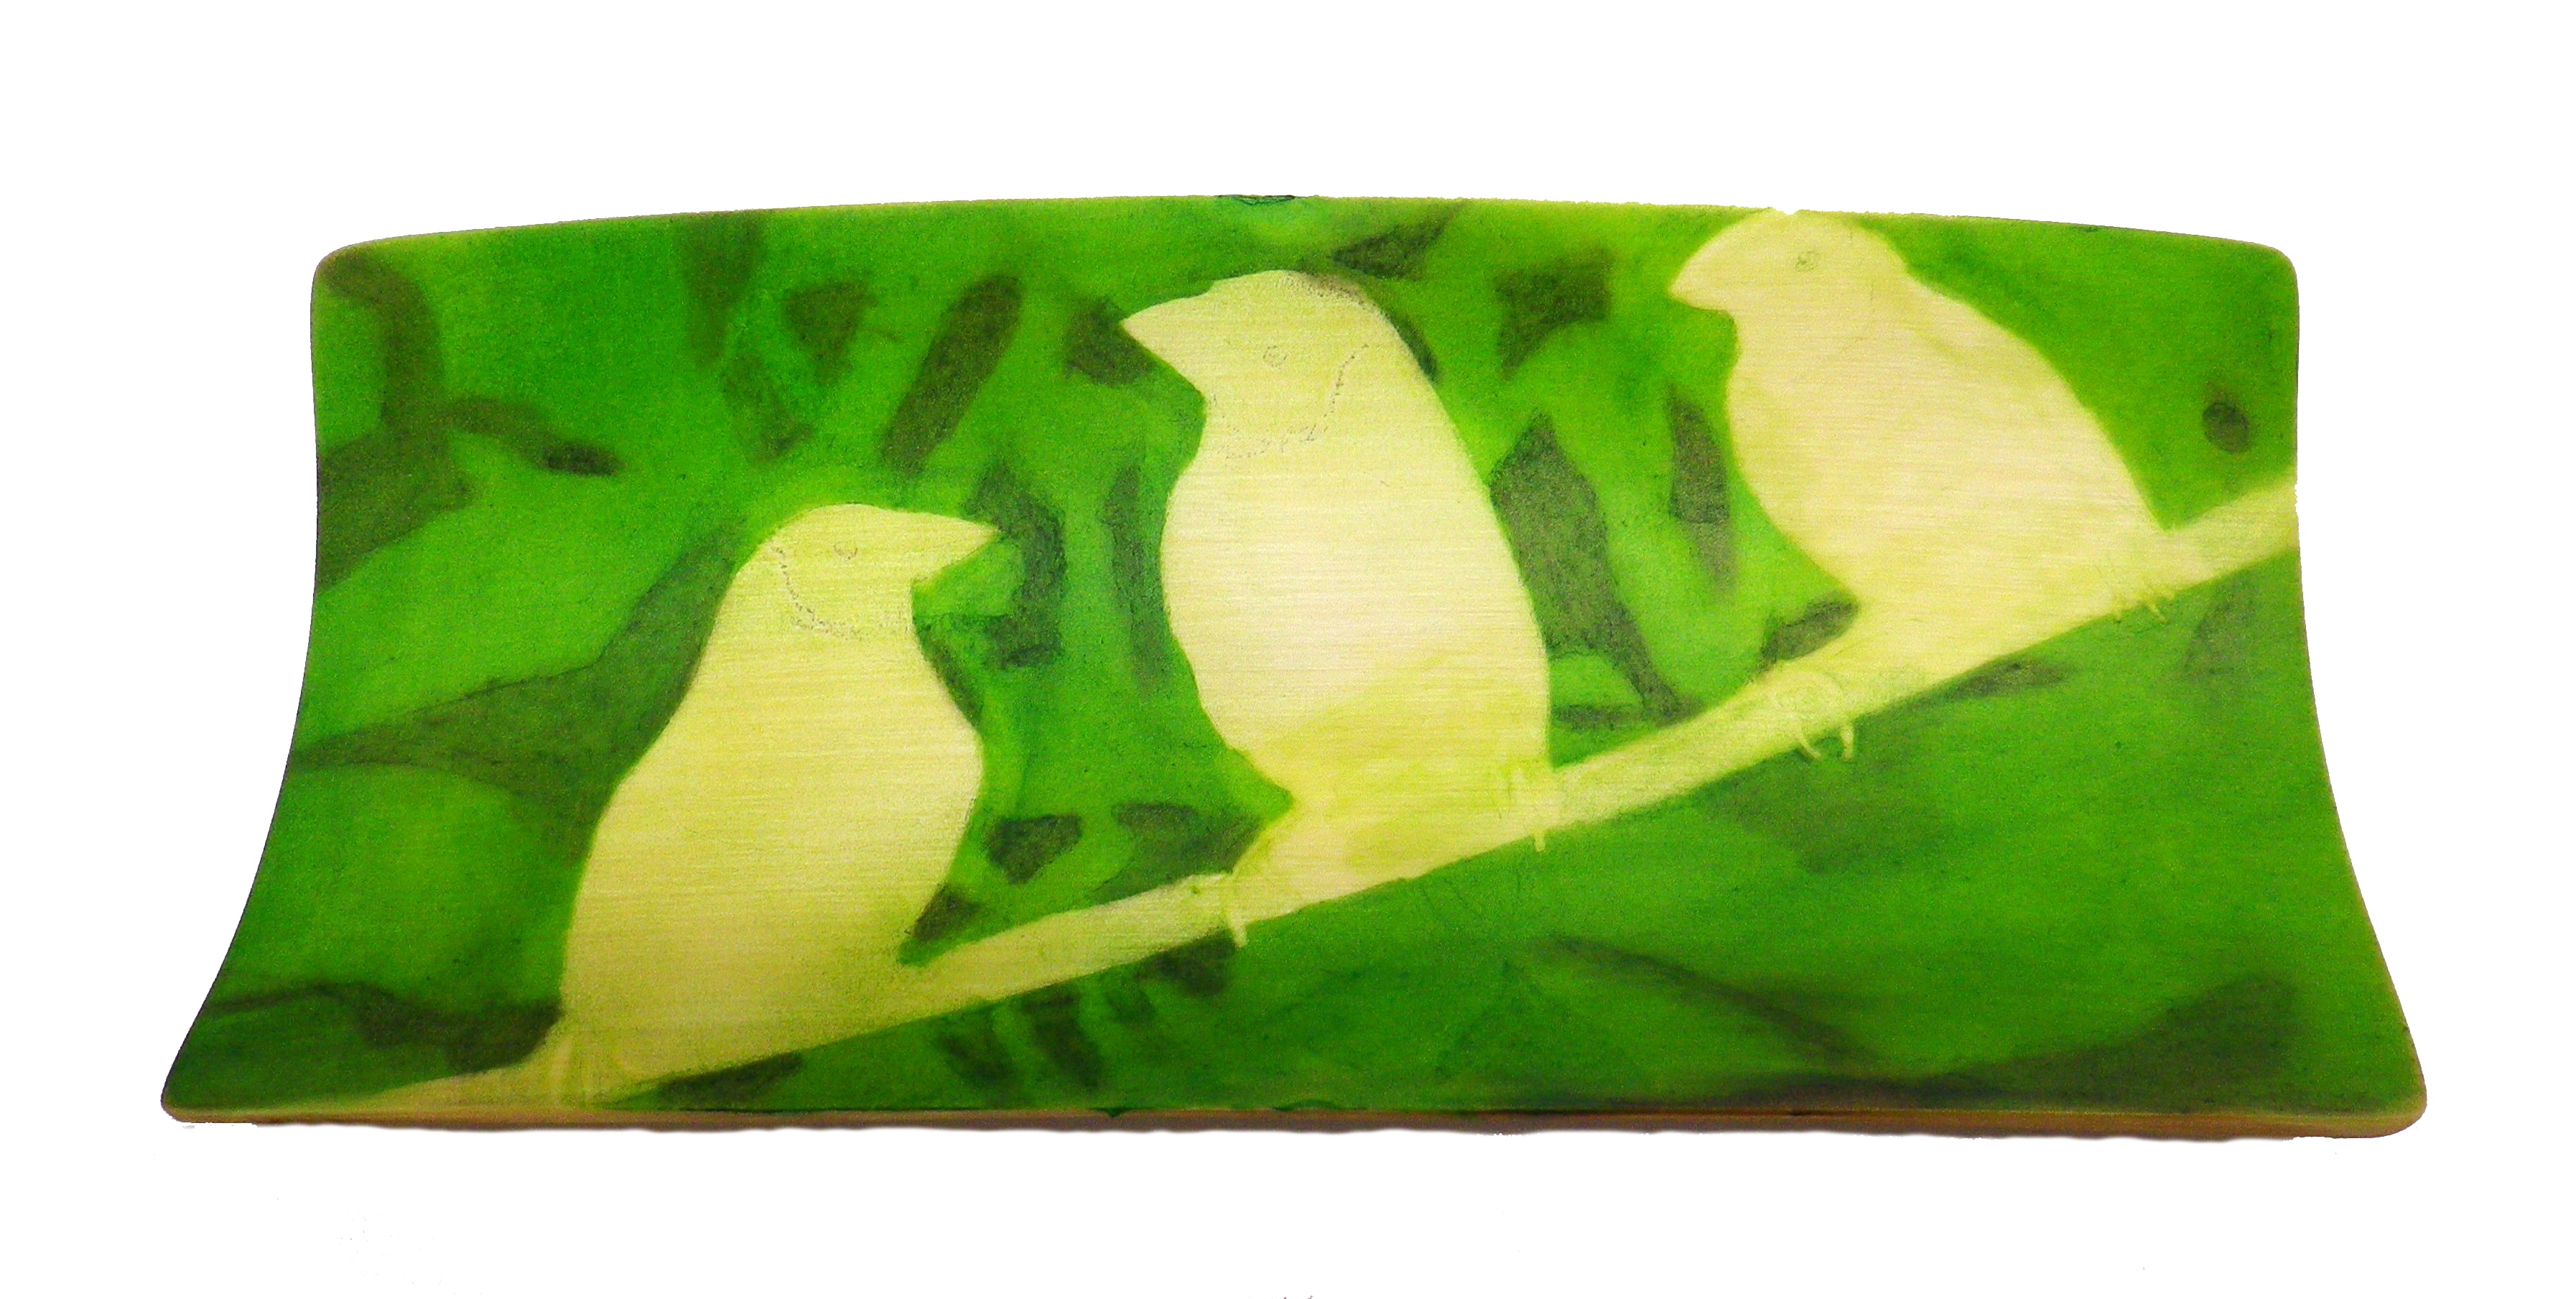
Finches Scrimshaw Light Background Added
Finches Scrimshaw Step 2 – 15/8/15
This is the ivory with background foliage added. The dark green of the leaves and the black shadows should make the finches really stand out. Scrimshawing a background that’s out of focus and blurred is hard and it takes a while to find the right effect.
When I apply the oil paint I might put several colours on top of each other to get the desired result. WARNING, be careful you don’t start to PAINT the ivory instead of scrimshawing. The paint must not sit on top but in the stippling/ cuts other wise you are painting and not scrimshawing.
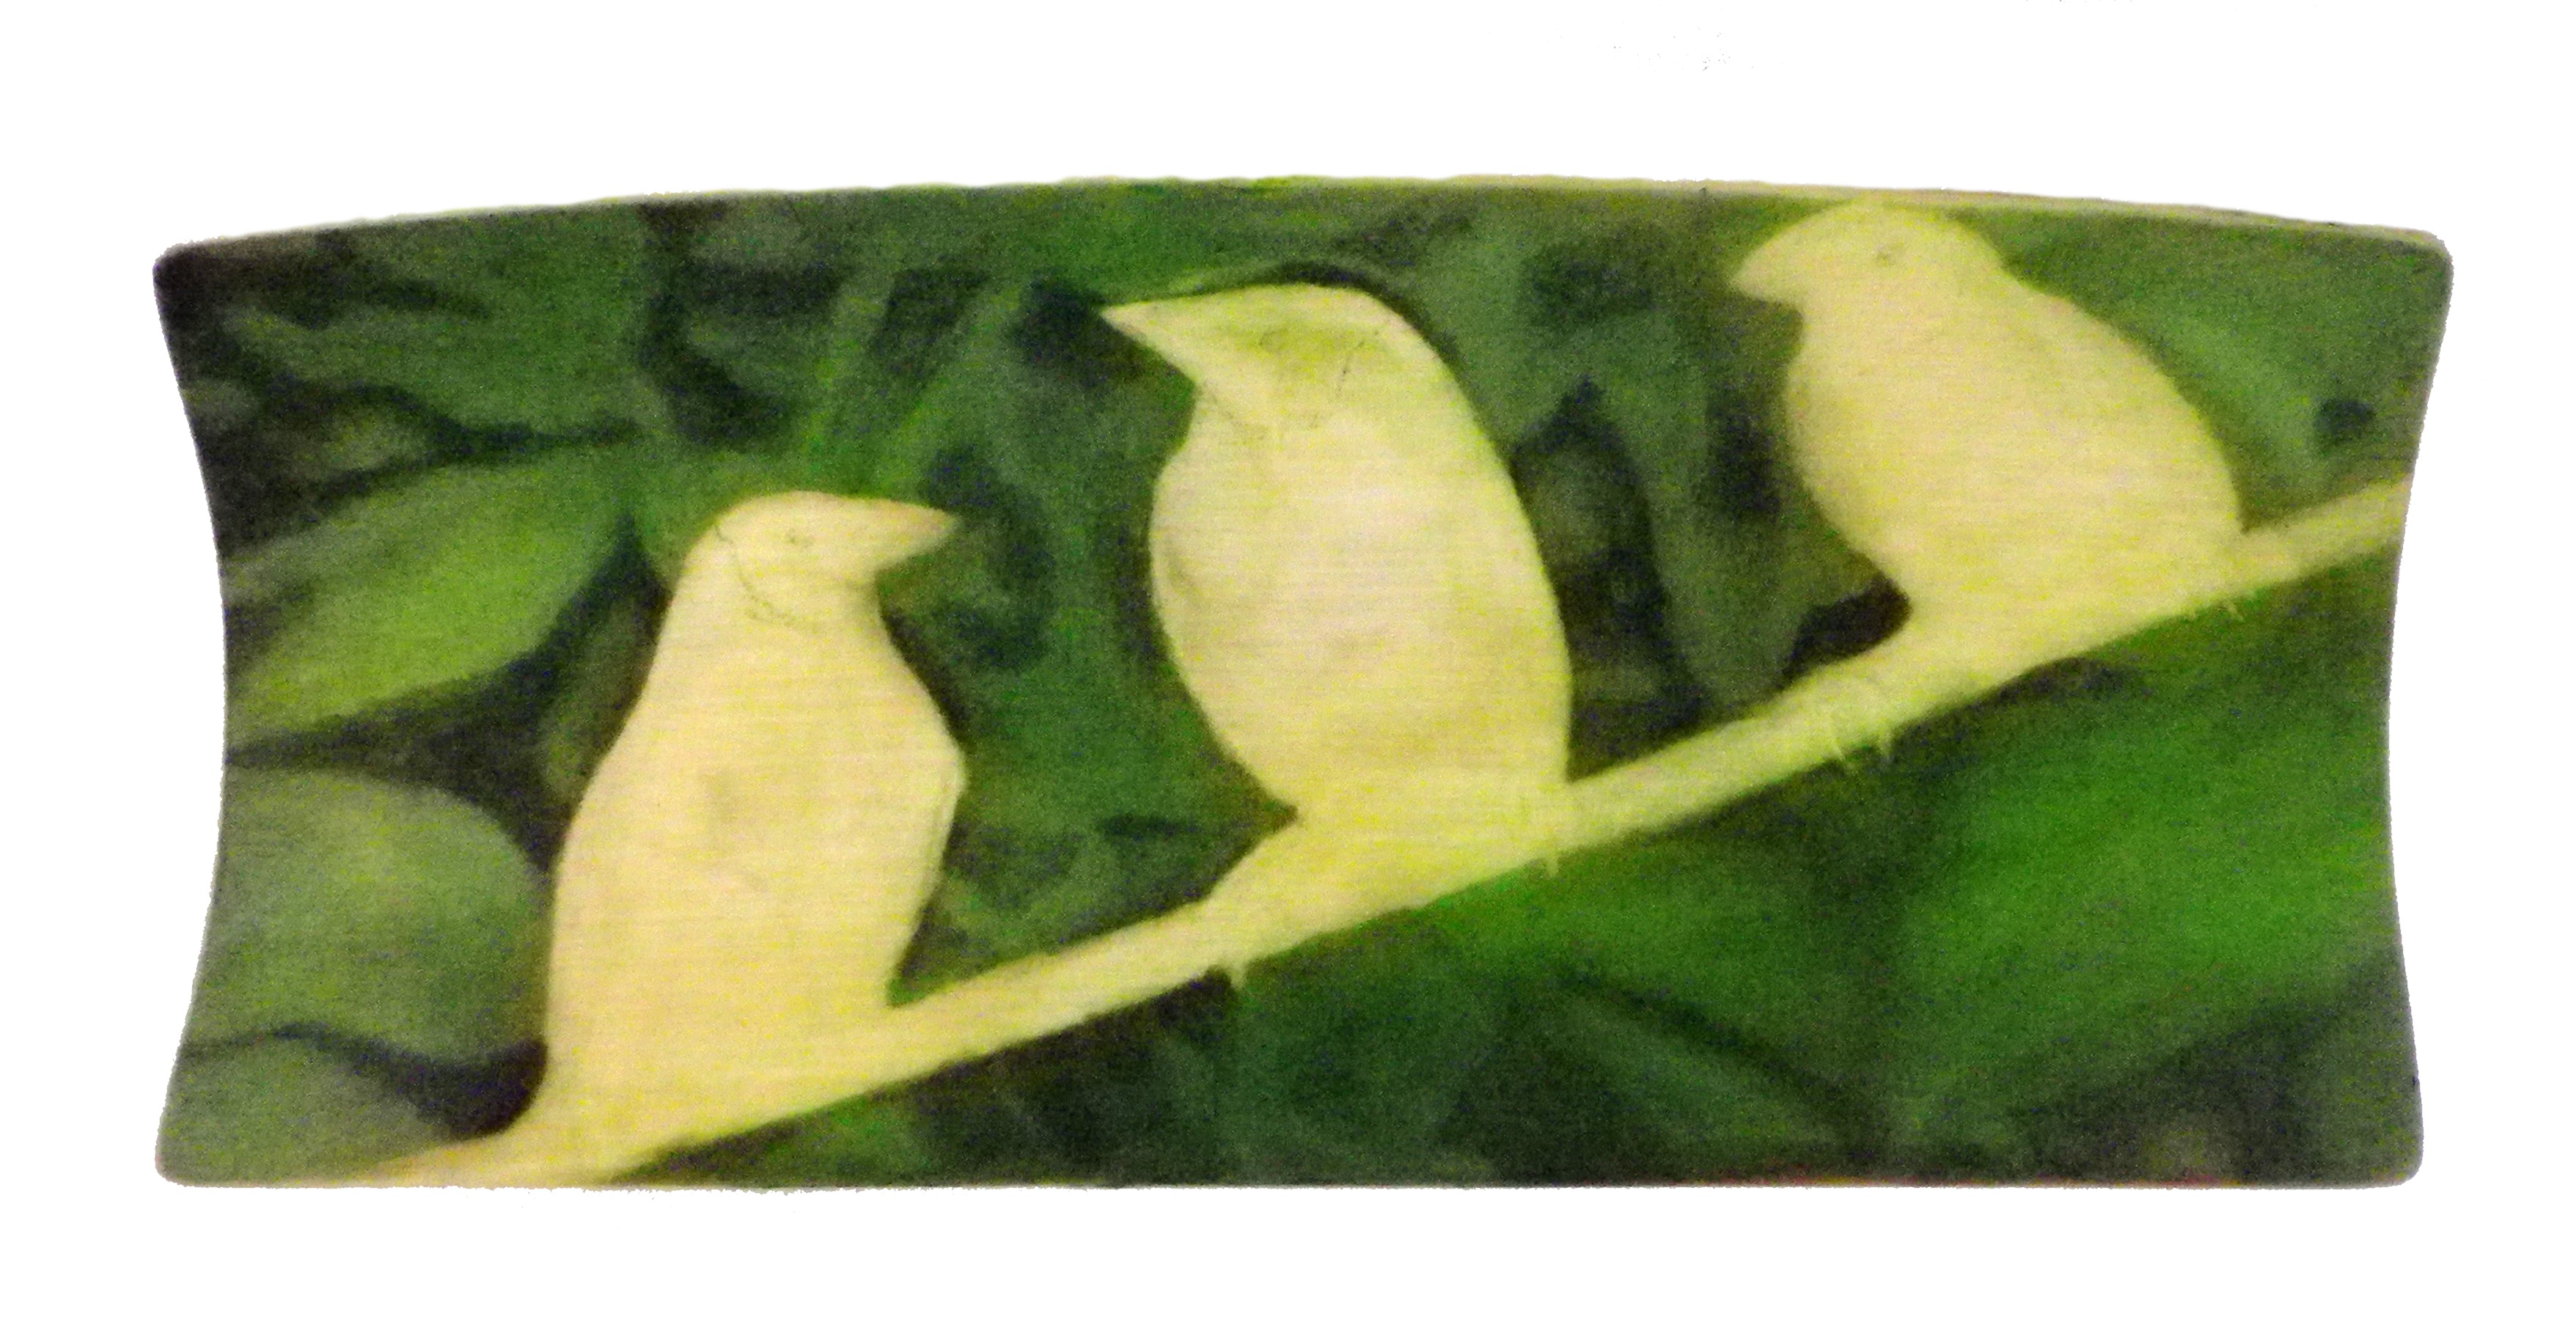
Finches Scrimshaw Dark Background Added
Finches Scrimshaw Step 3 – 16/8/15
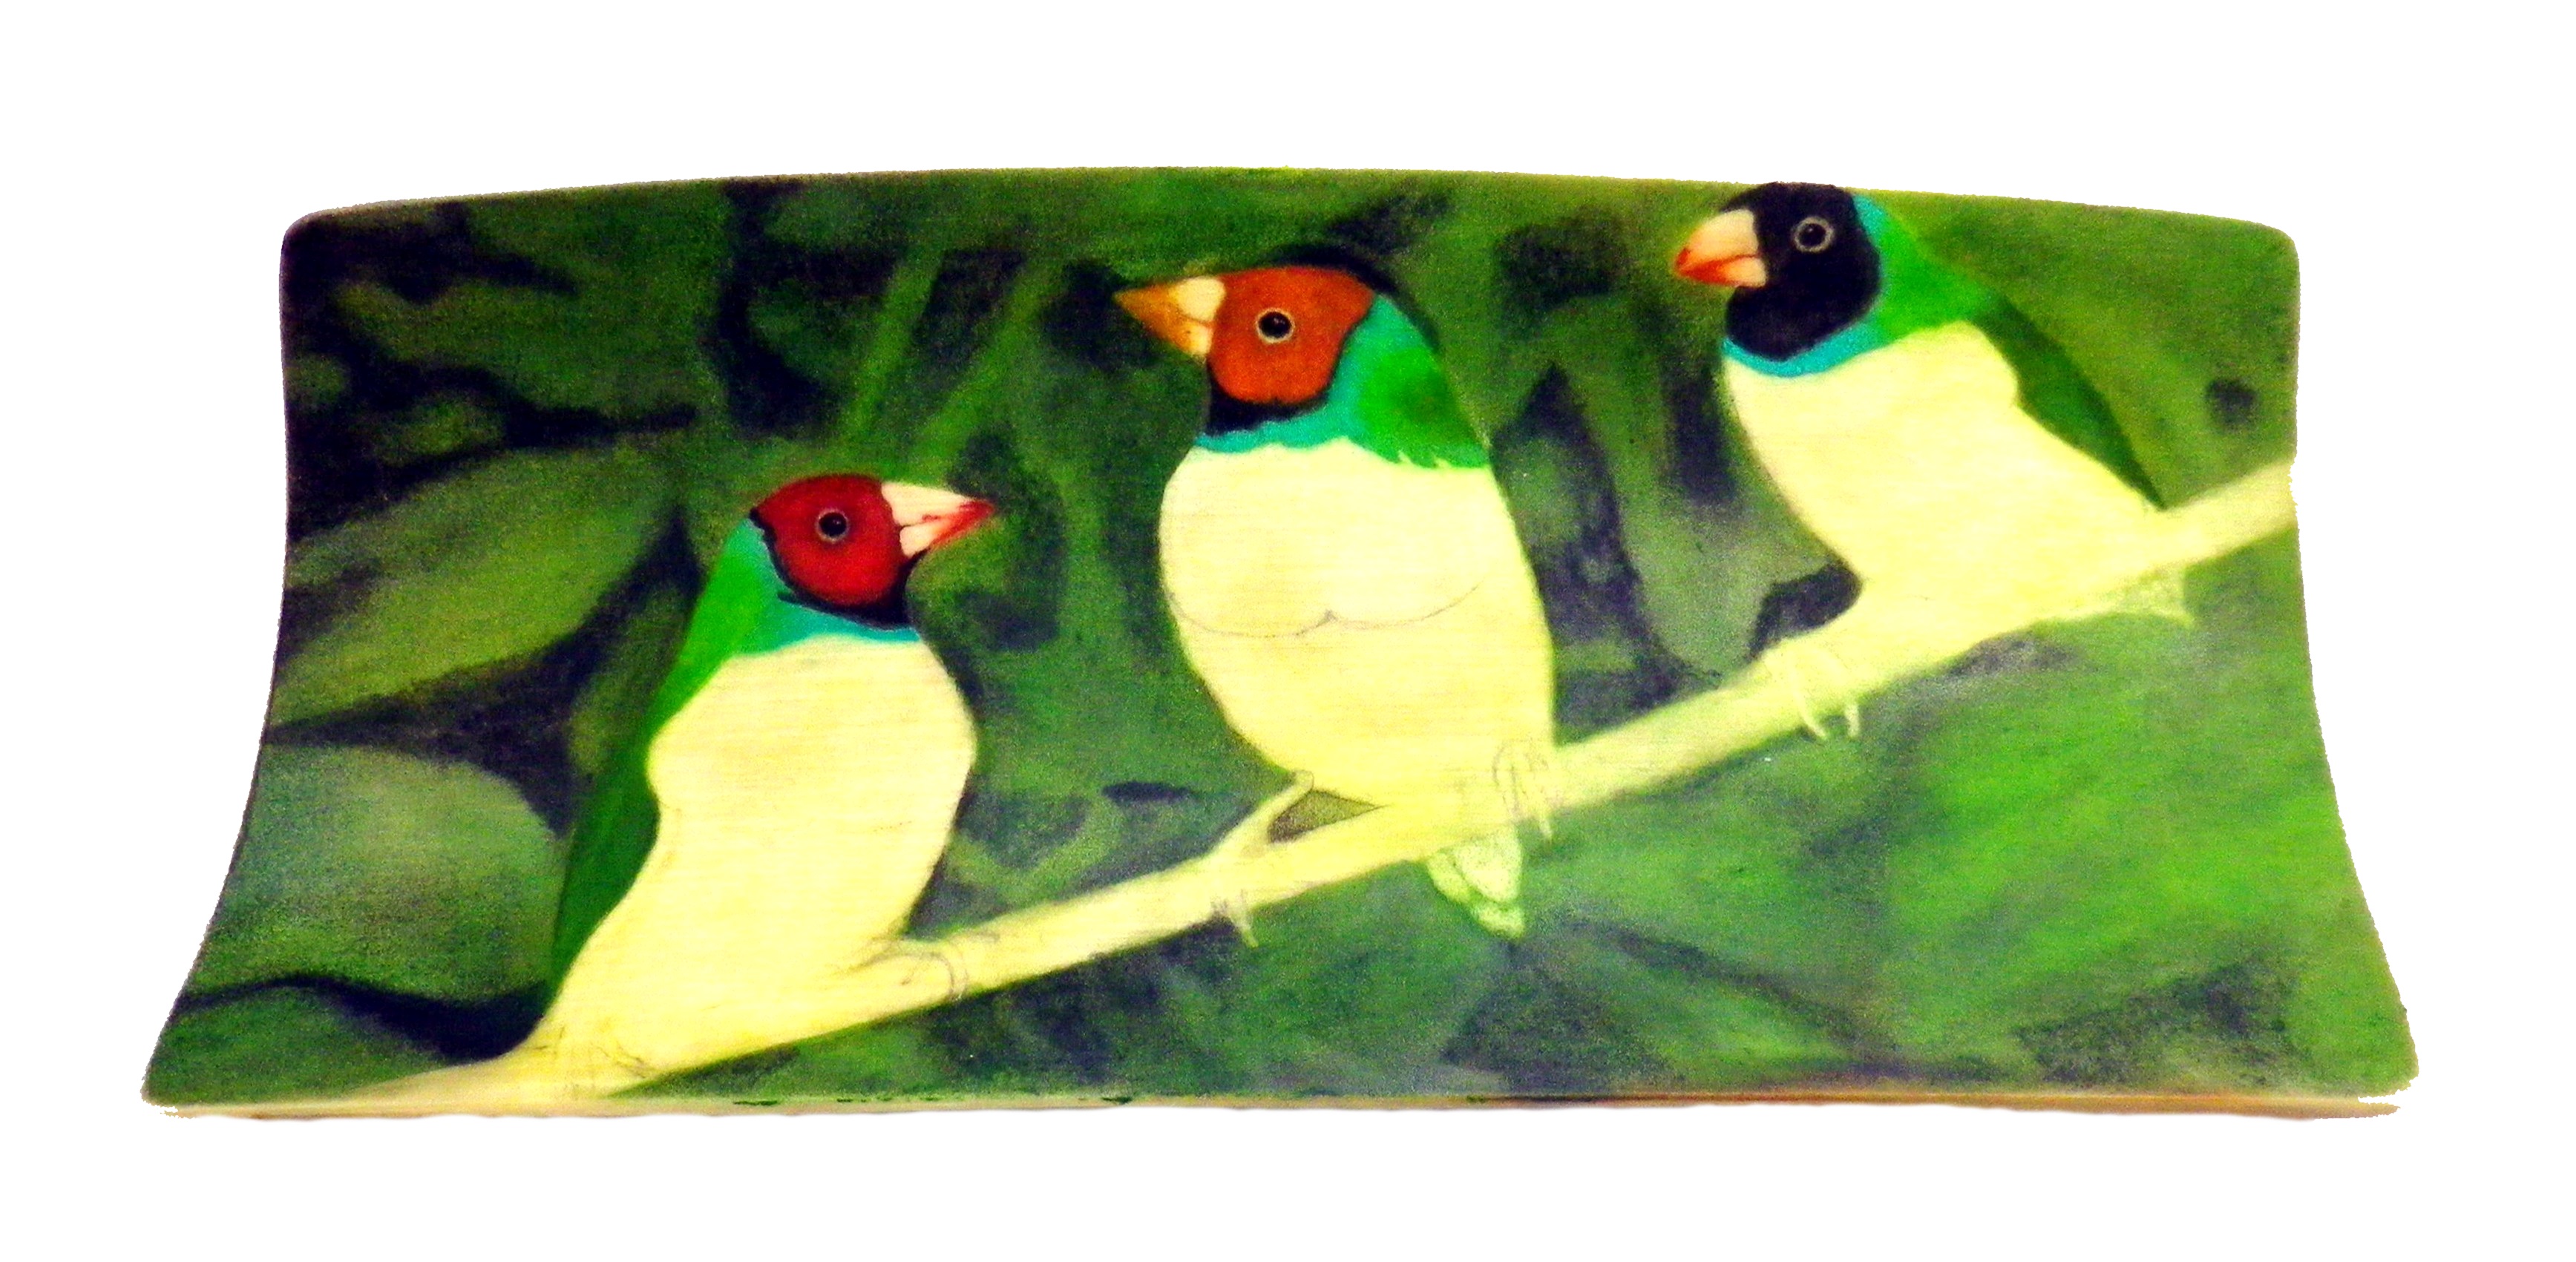
The finches heads are now done. They’ve been quite easy and quick to do. Next I’ll work my way down the bodies. Hopefully this’ll be a quick scrimshaw.

Finches Scrimshaw Heads Added
Finches Scrimshaw Step 4 – 17/8/15
The finches necks and wings are finished. Next I’ll scrimshaw the chests in purple.
Finches Scrimshaw Heads, Necks and Wings Added
Finches Scrimshaw Step 5 – 18/8/15
With the purple areas finished the Scrimshaw is starting to take shape. Next I’ll add the bottom half of the finches in a yellowish orange colour.

Finches Scrimshaw With Chests Added
Finches Scrimshaw Step 6 – 19/8/15
Now that the bodies are completed I’ll begin on the perch.
Finches Scrimshaw With Bodies Finished
Finches Scrimshaw Step 7 – 10/9/15
The feet and perch are finally finished. Next I’ll start on the stand.
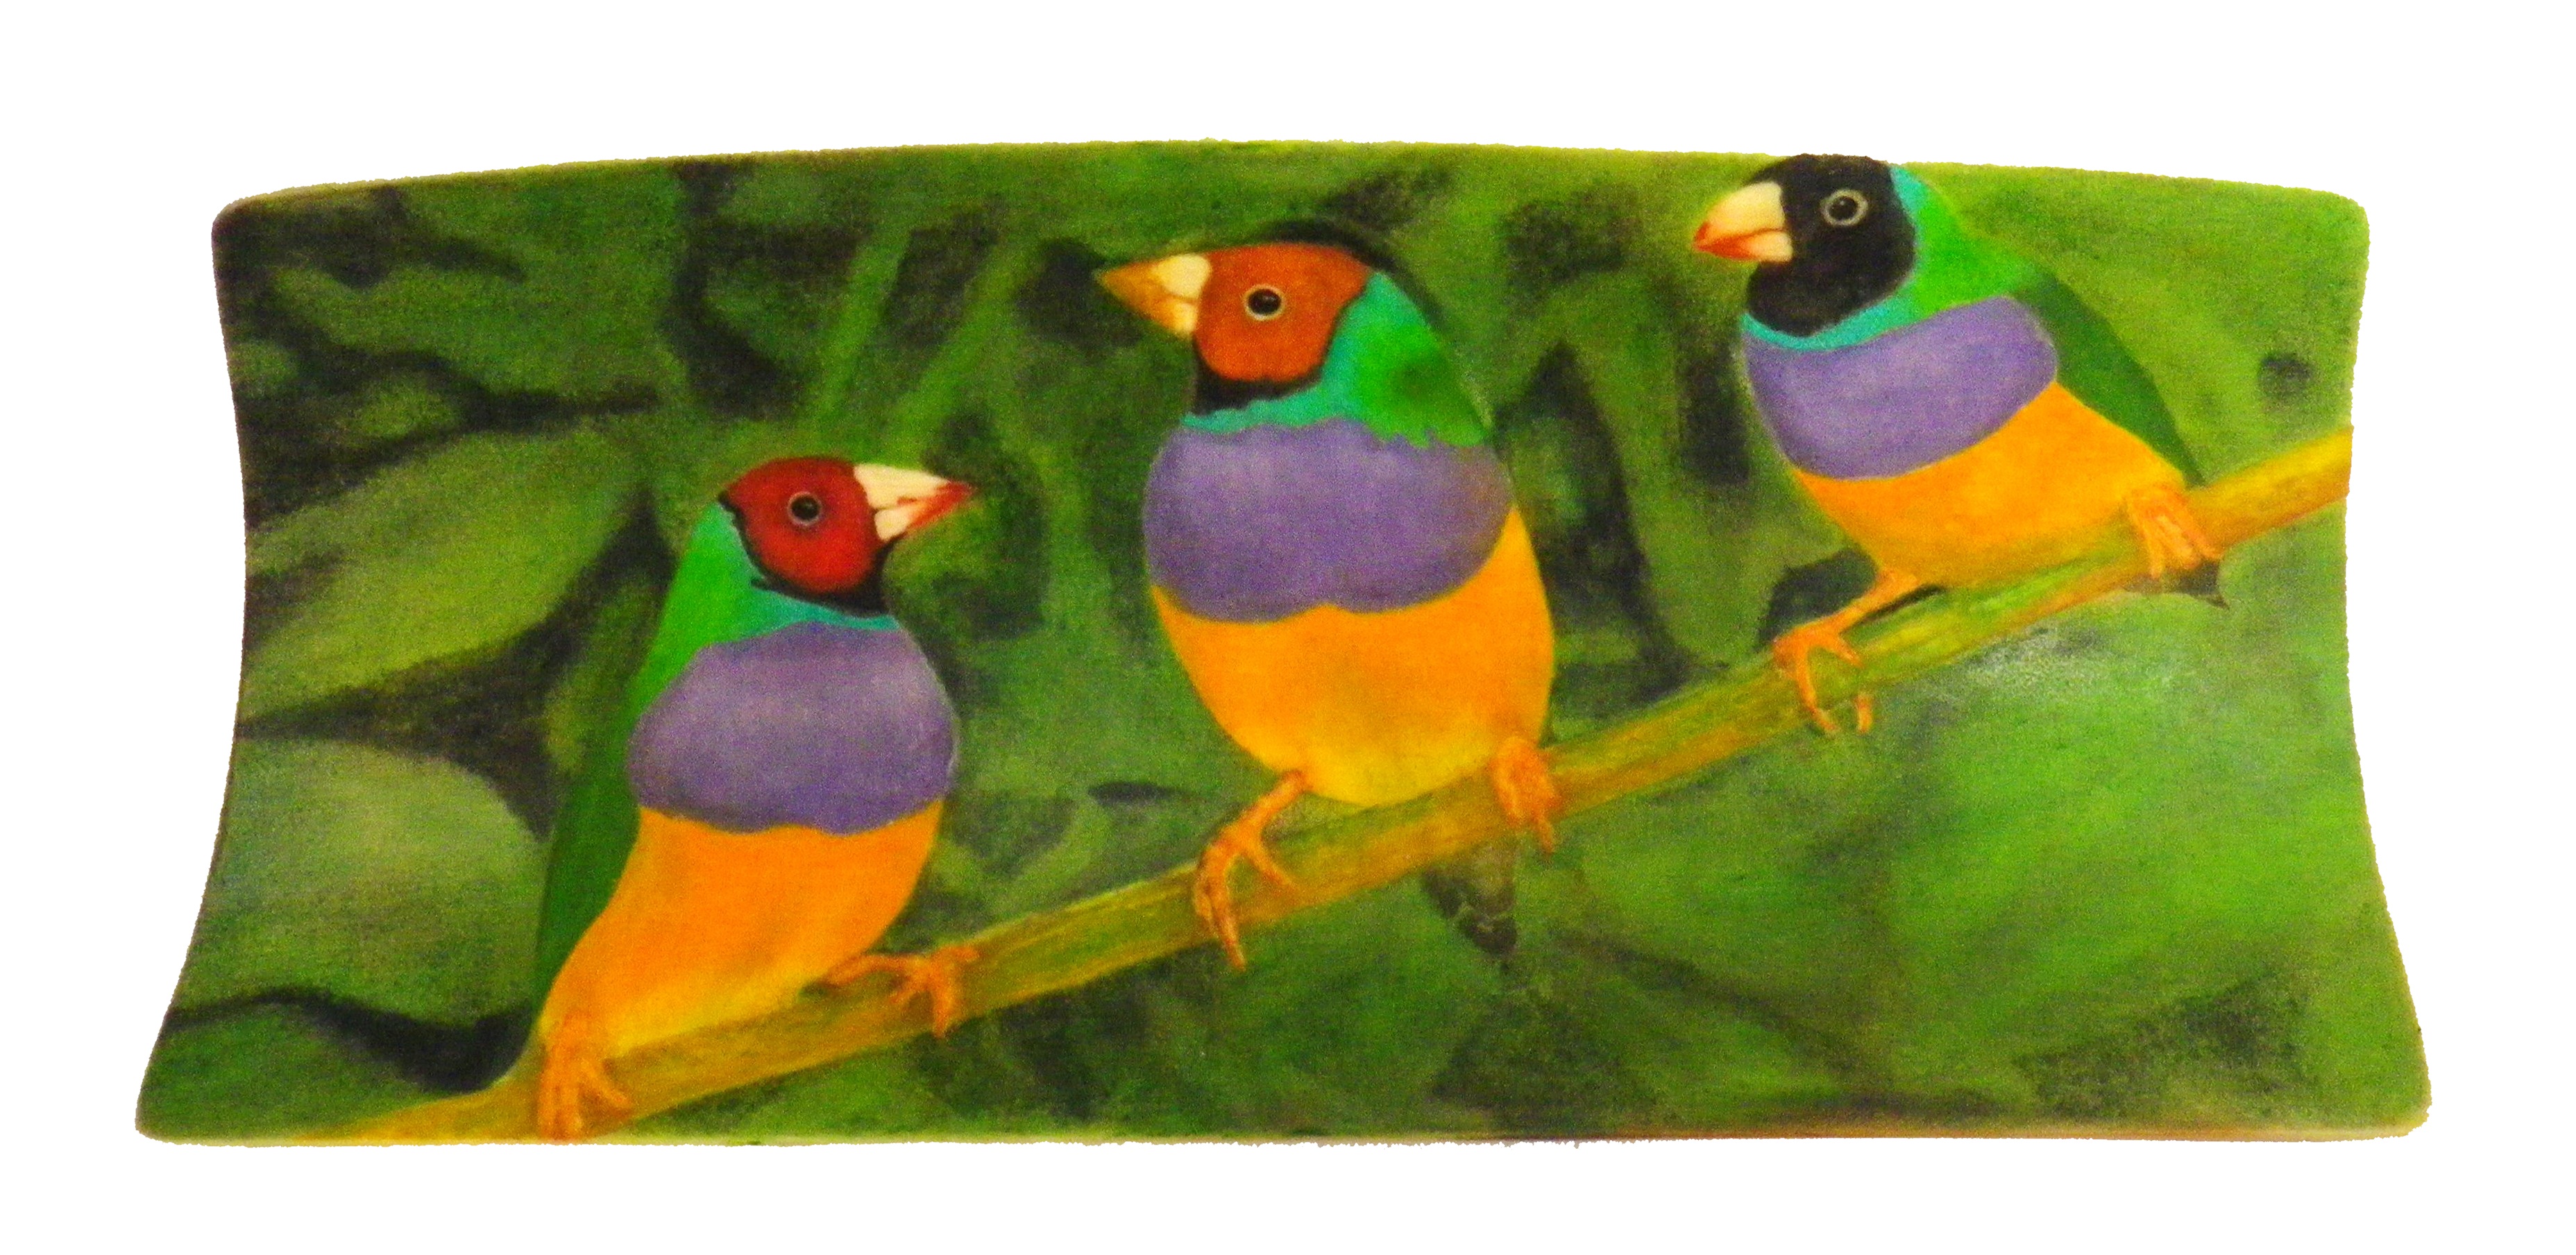
Finches Scrimshaw With Bodies and Perch Finished
Base/ Stand
This is the same wood that I used for the Yellow Fin Tuna stand. It measures 20cm long x 10cm high and 4.5cm thick.
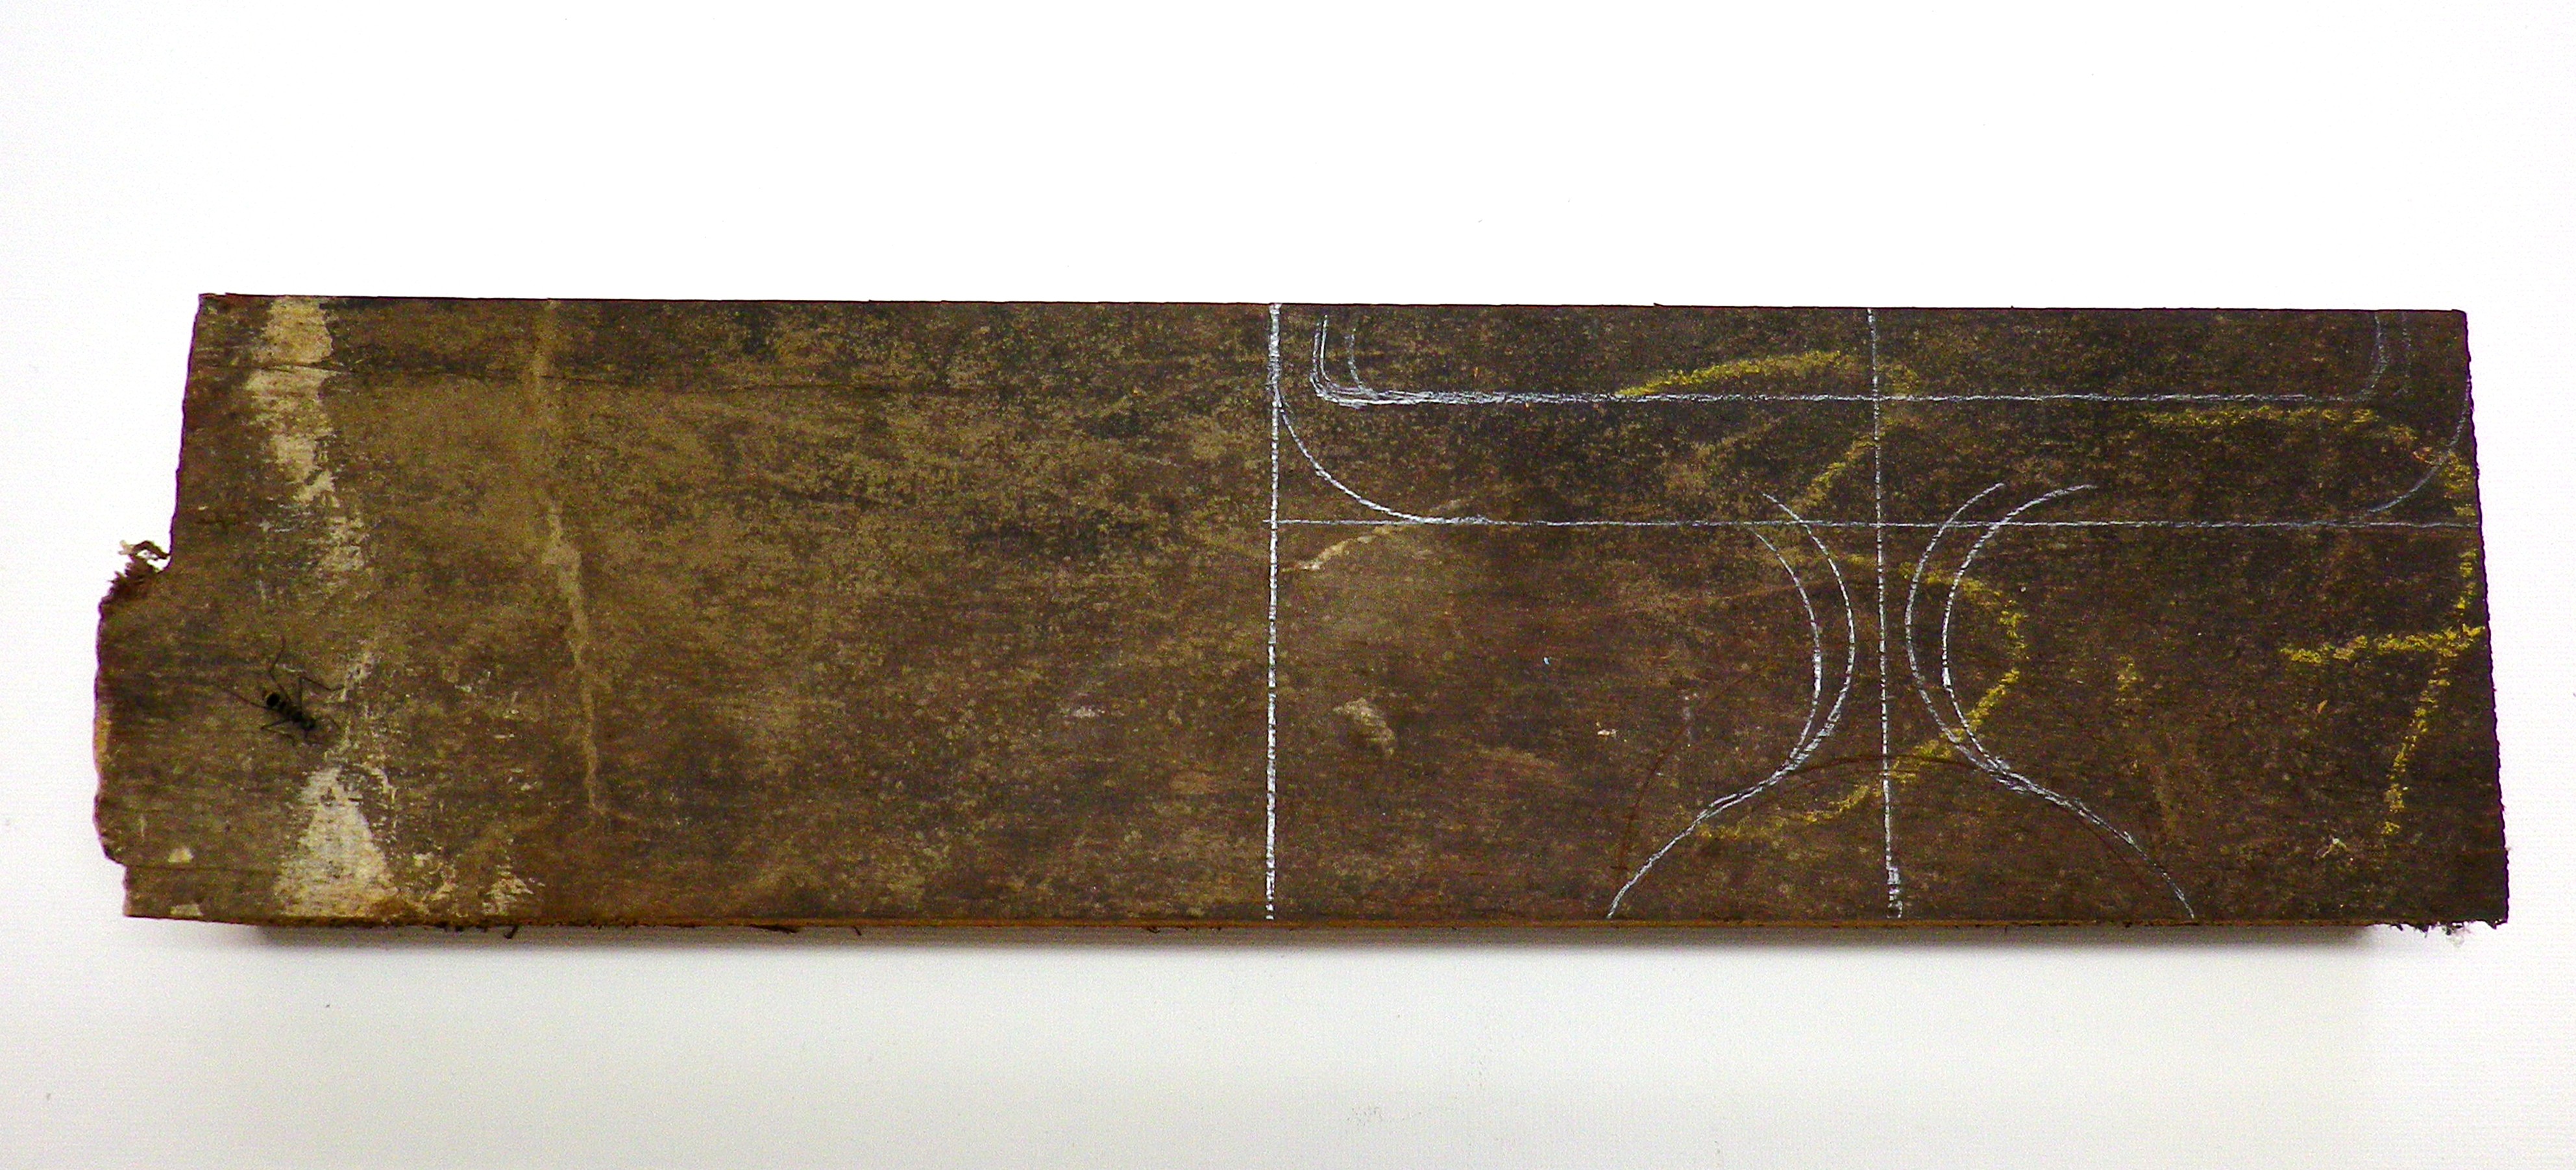
Wood For Finches Scrimshaw Stand
First I drew the outline of the stand onto the wood and then used a band saw to cut out the shape.
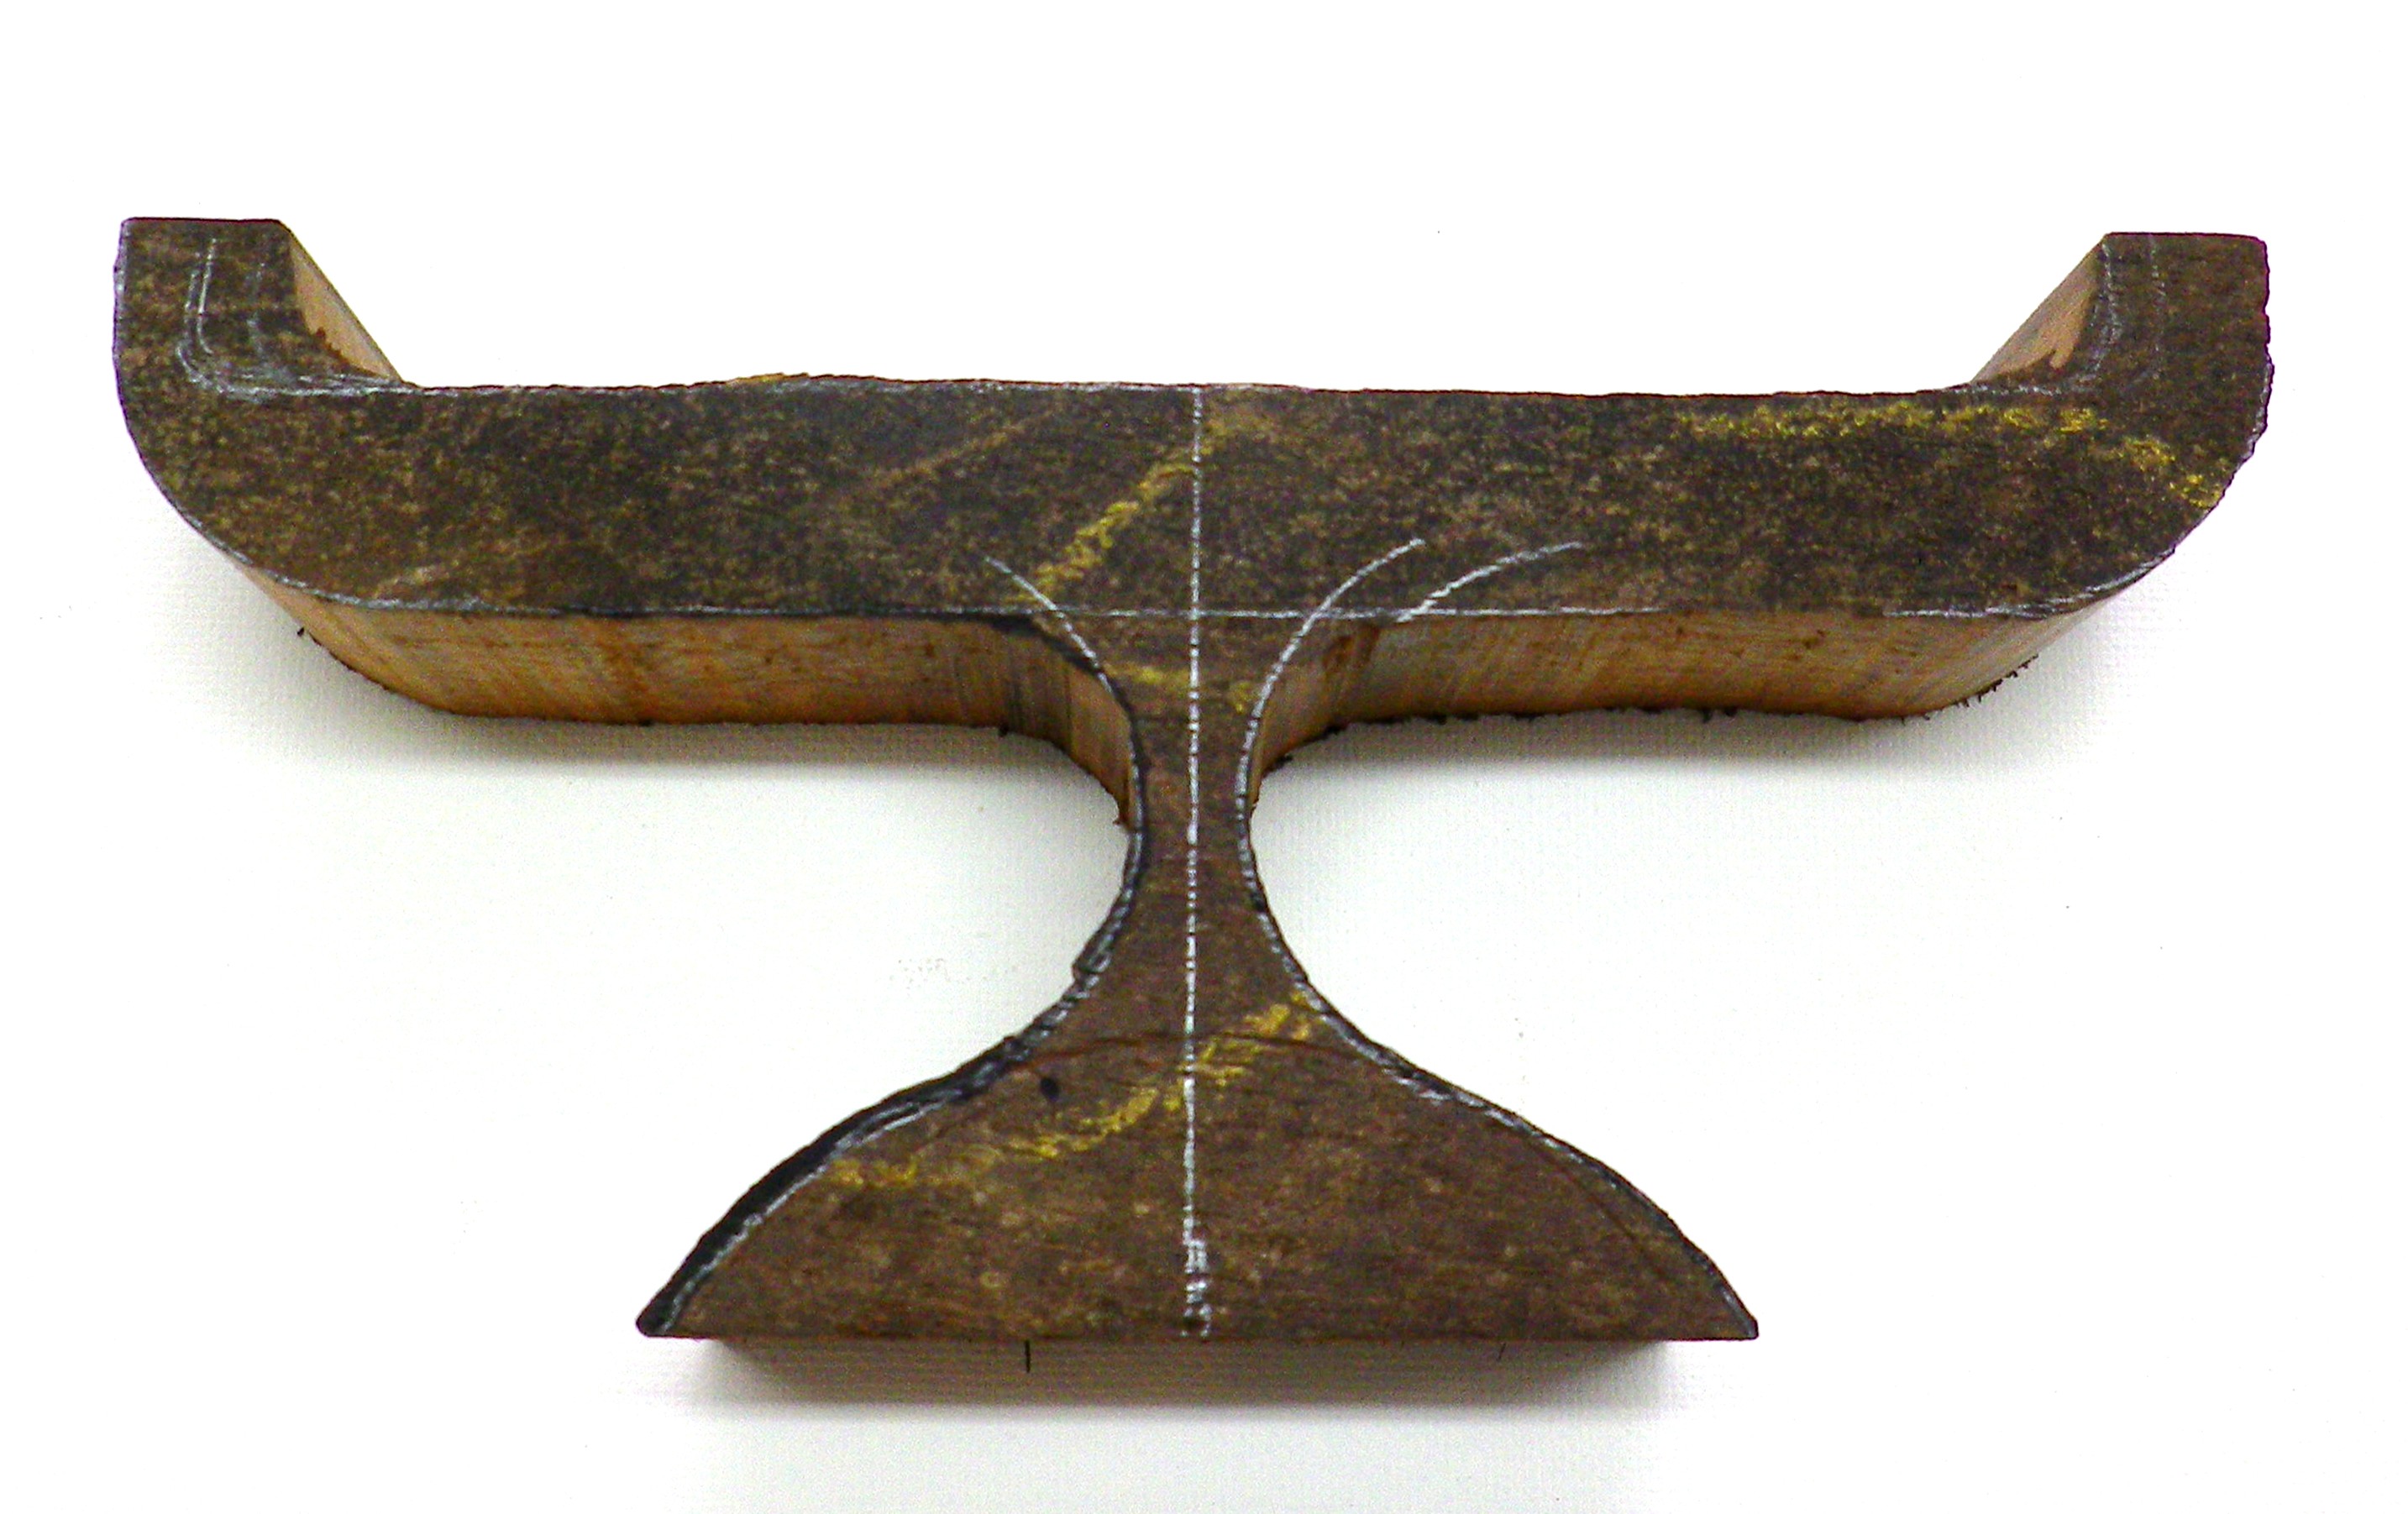
Wood For Finches Scrimshaw Stand Cut to Shape
Next the stand was sanded down to the finished shape. Then I made a name plate from mammoth ivory and stippled it.
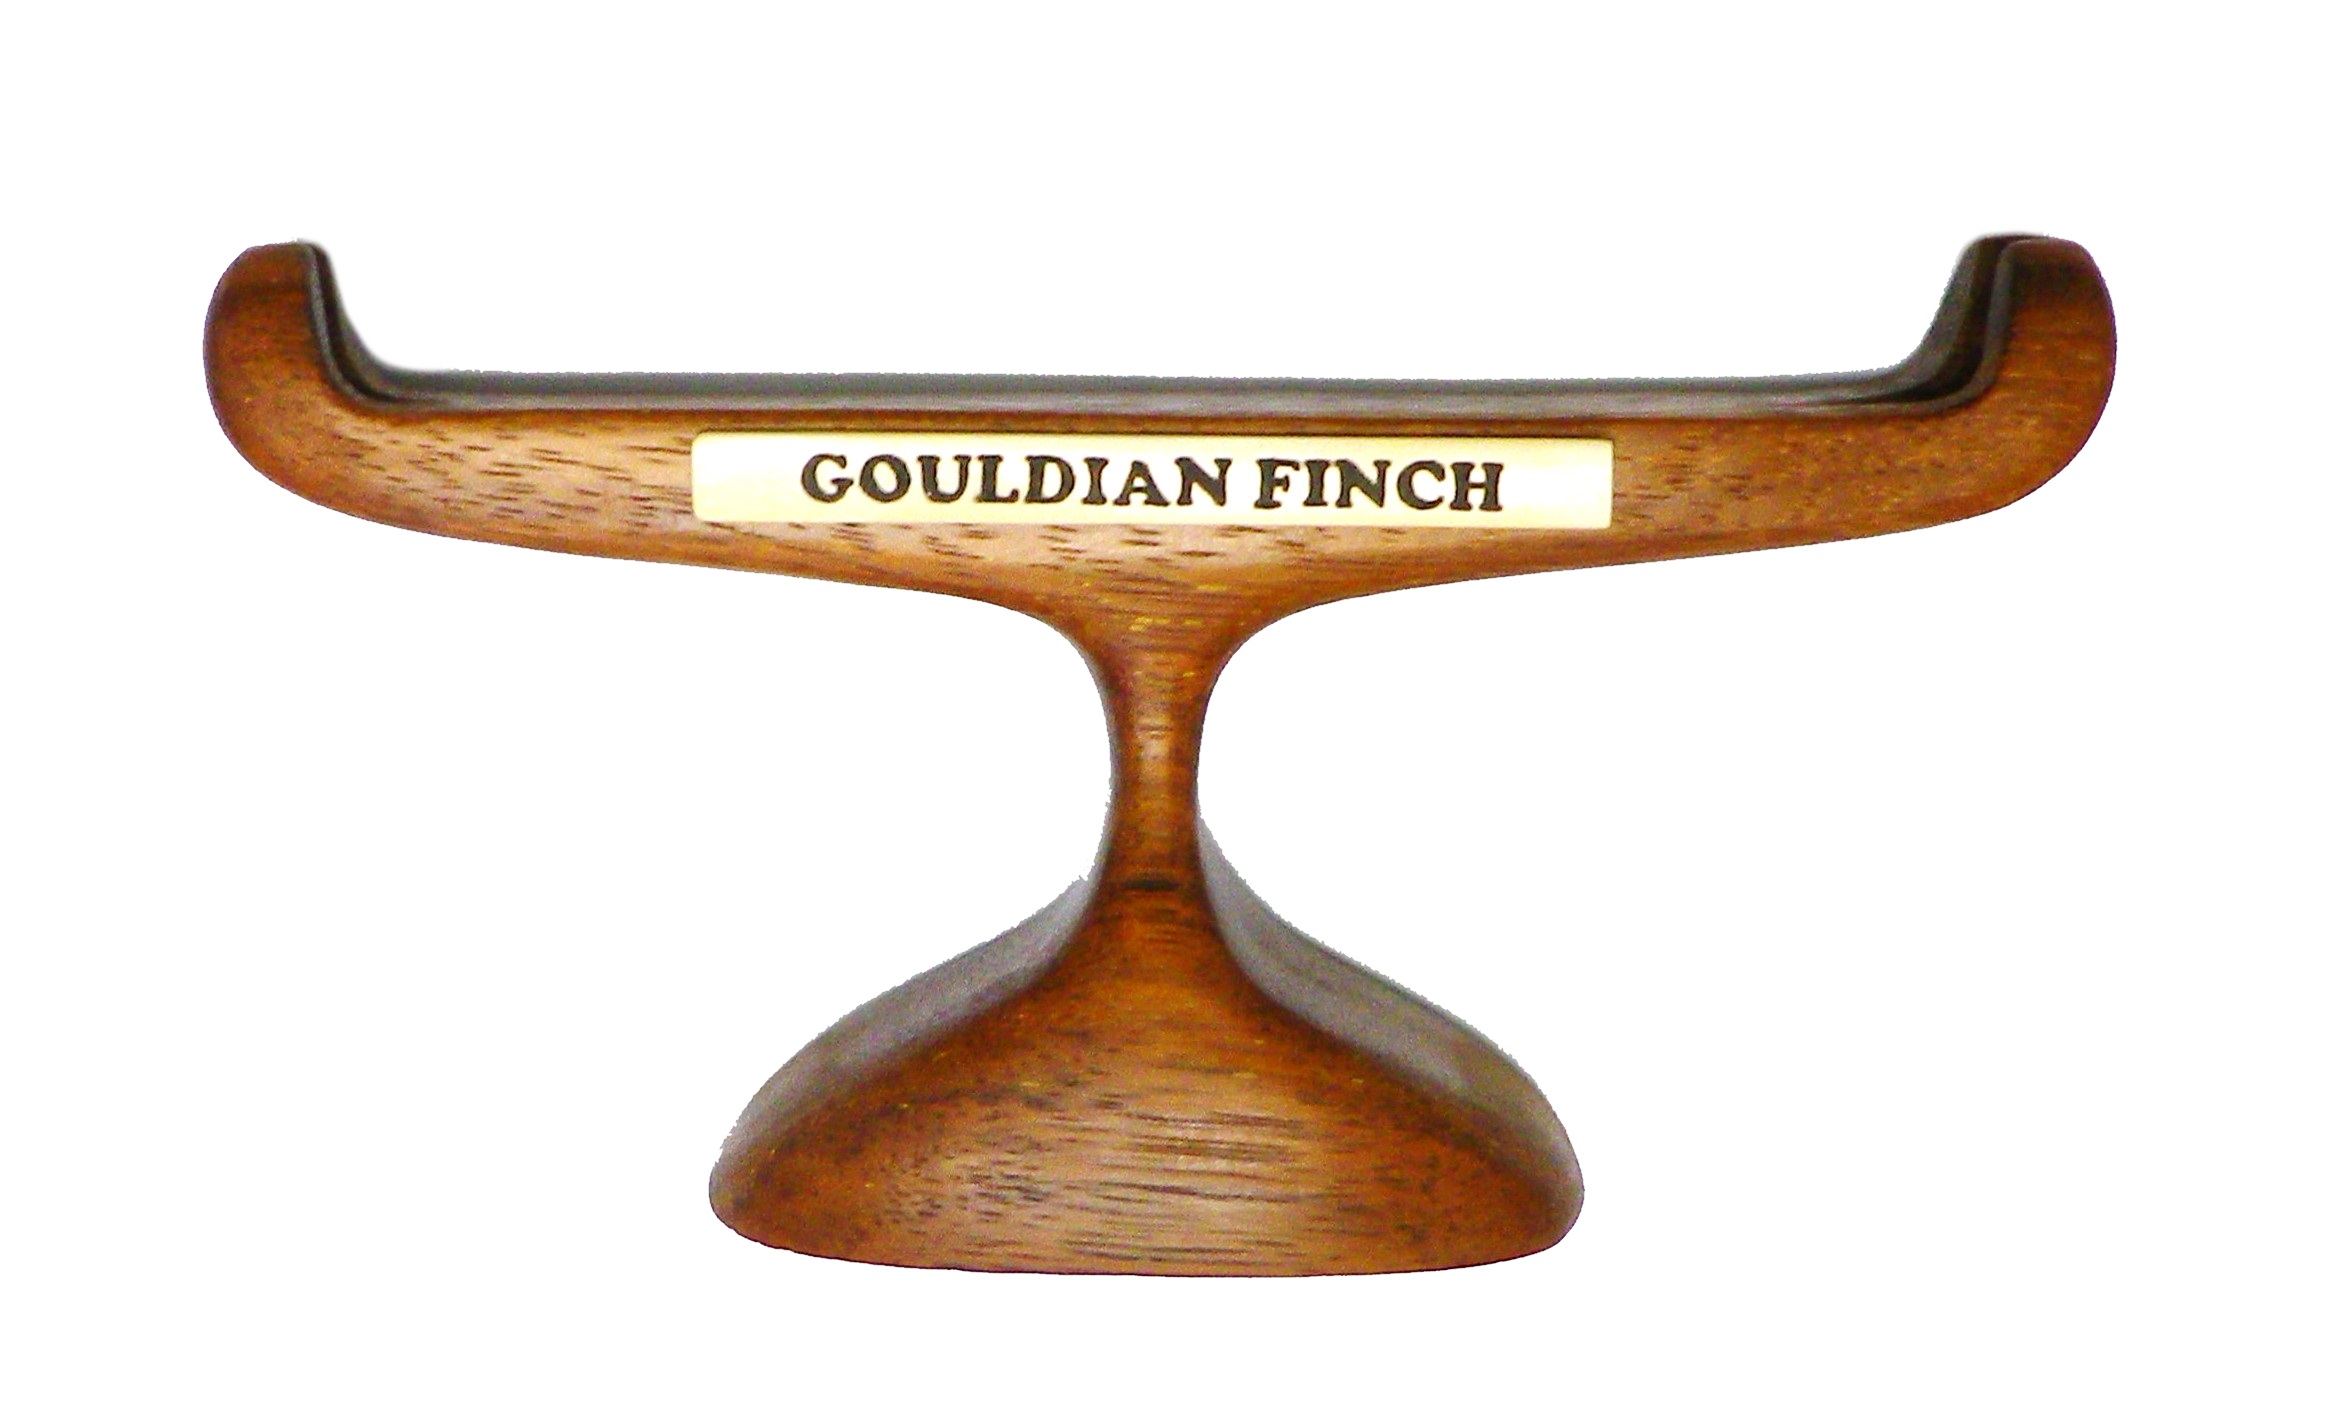
Gouldian Finches Scrimshaw Stand Finished
The finished scrimshaw on its stand.
Gouldian Finches Scrimshaw Finished
The End.
Contact Rod: randclacey@bigpond.com

You must be logged in to post a comment.