Tuna Scrimshaw Step 1 – 24/5/15
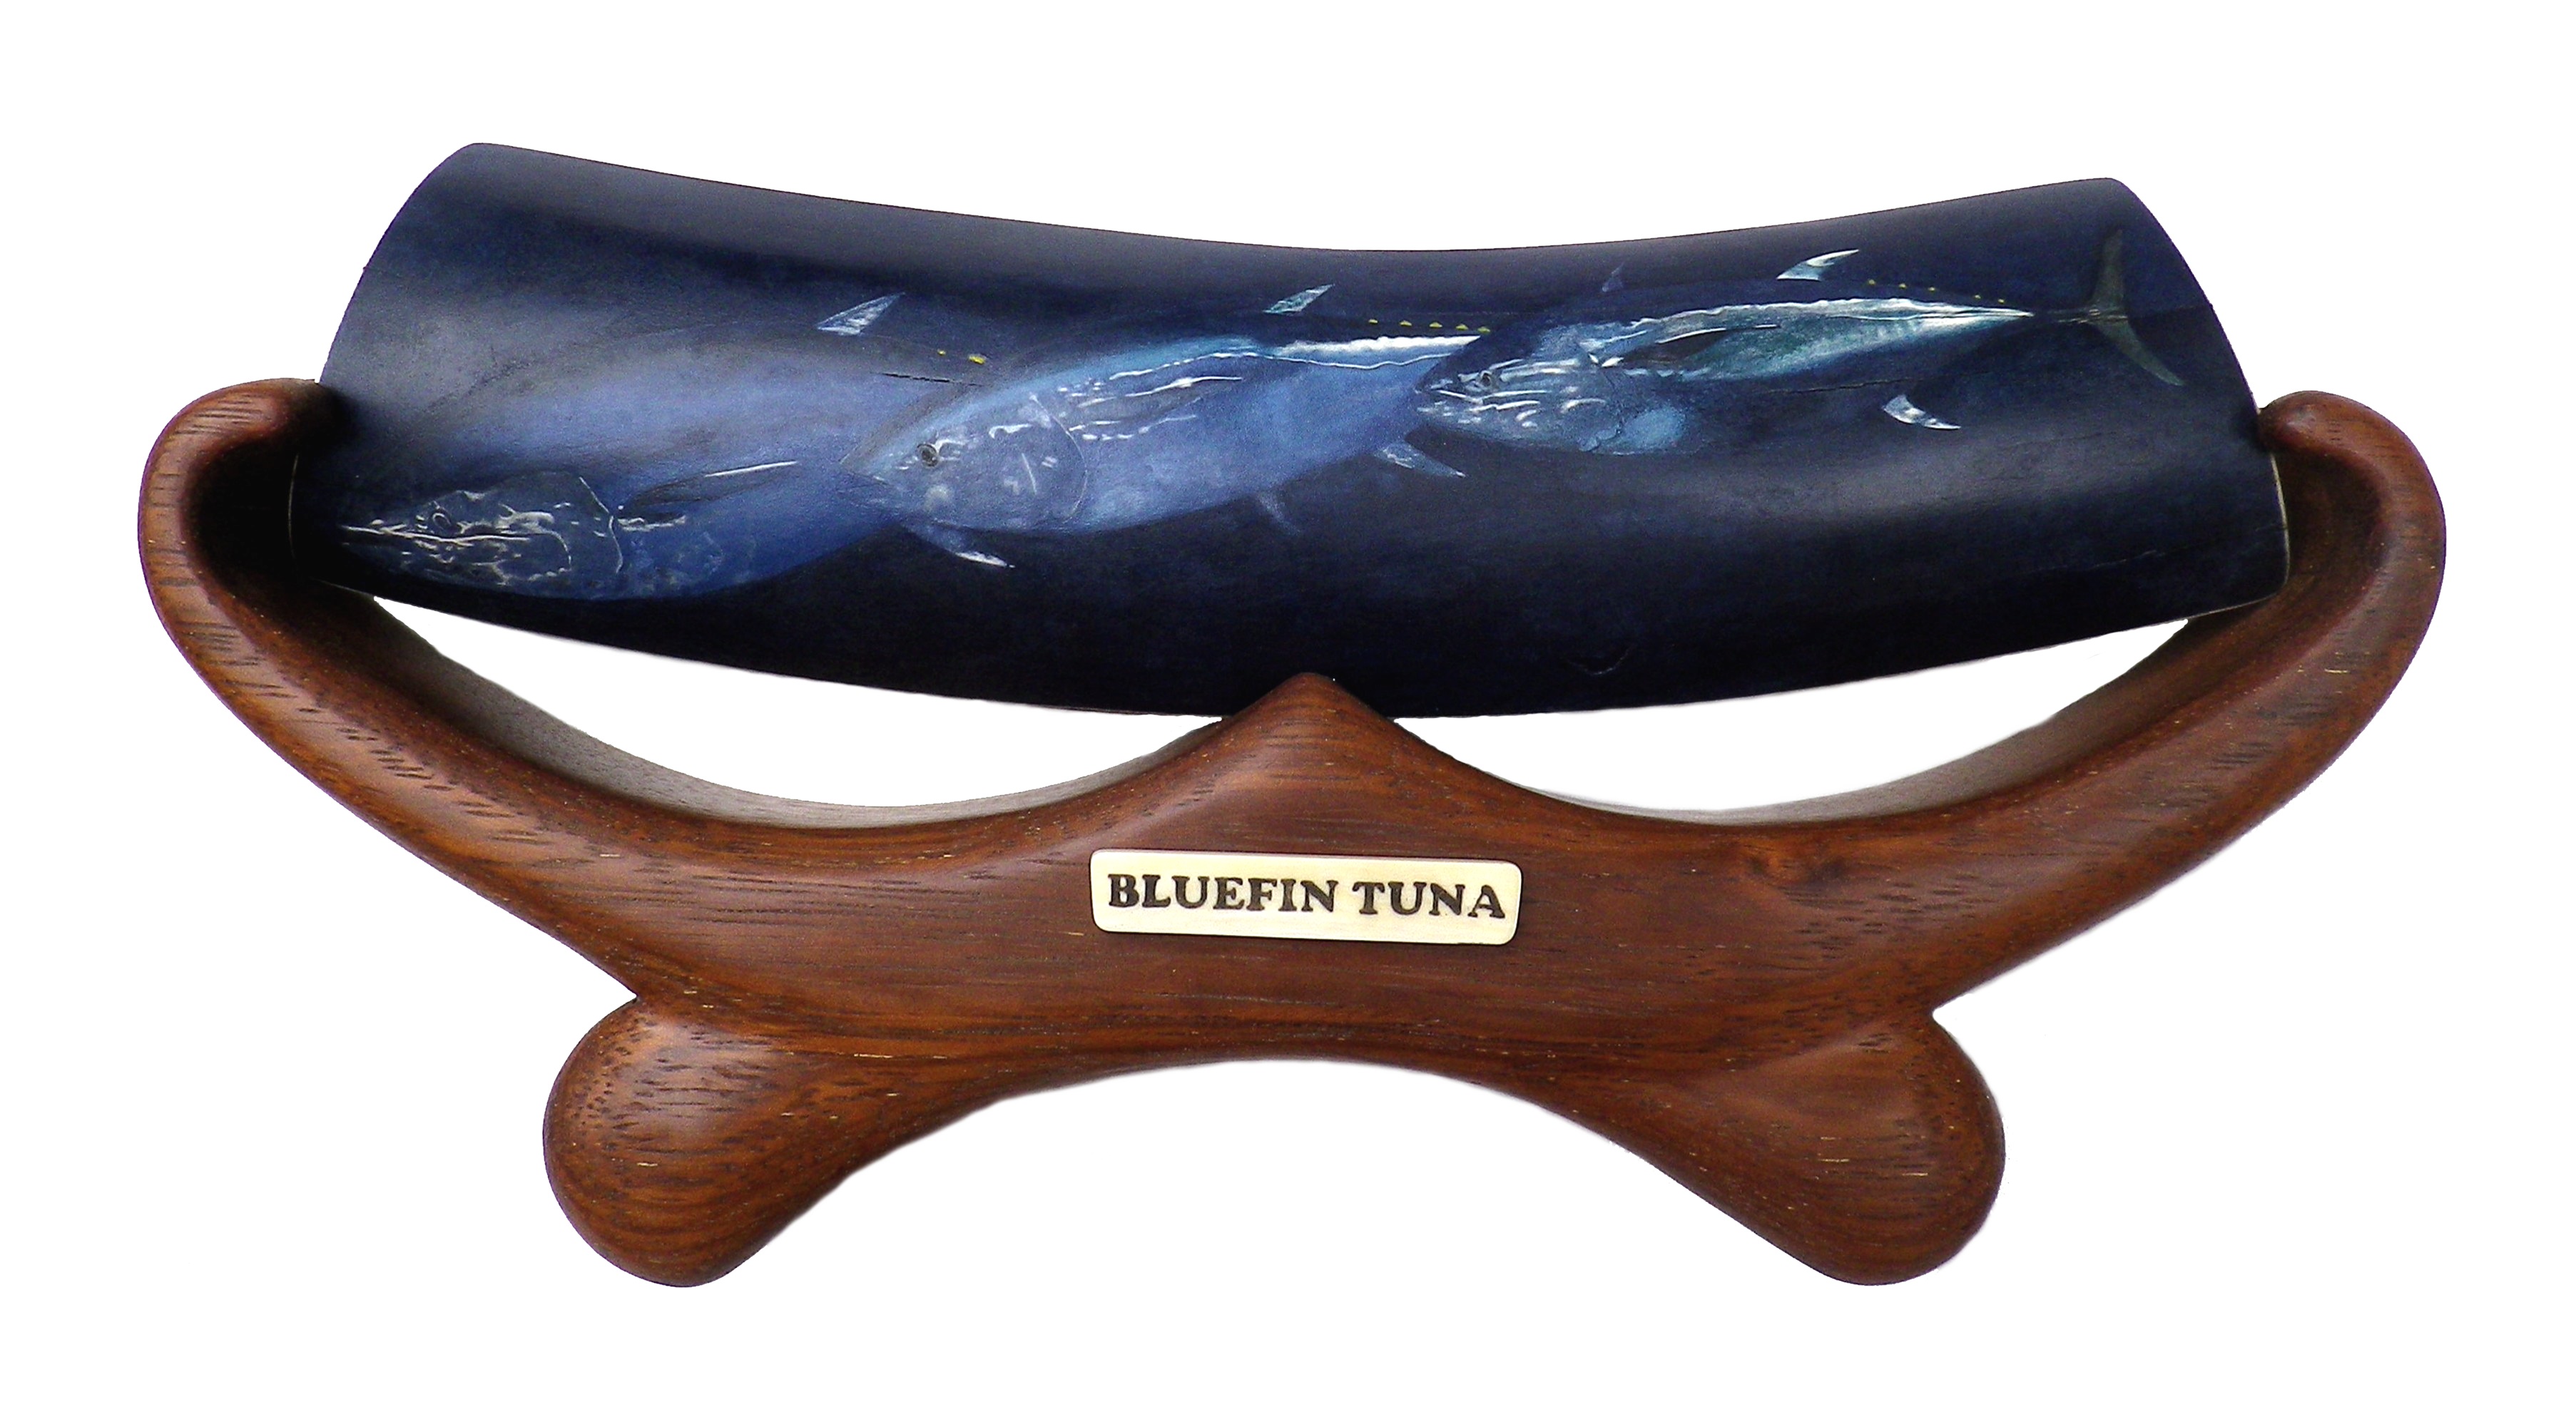
Tuna Scrimshaw – “Bluefin Tuna”
I like the simplicity and intense blue of this with the silver tuna swimming across the frame.
The mammoth ivory for this piece measures 34.5cm long x 10cm high and weighs 801 grams.
The ivory had to be sanded down to 600grit. There are a few cracks showing through the surface but it adds character to the piece and there isn’t much that can done about it without sanding the ivory away.
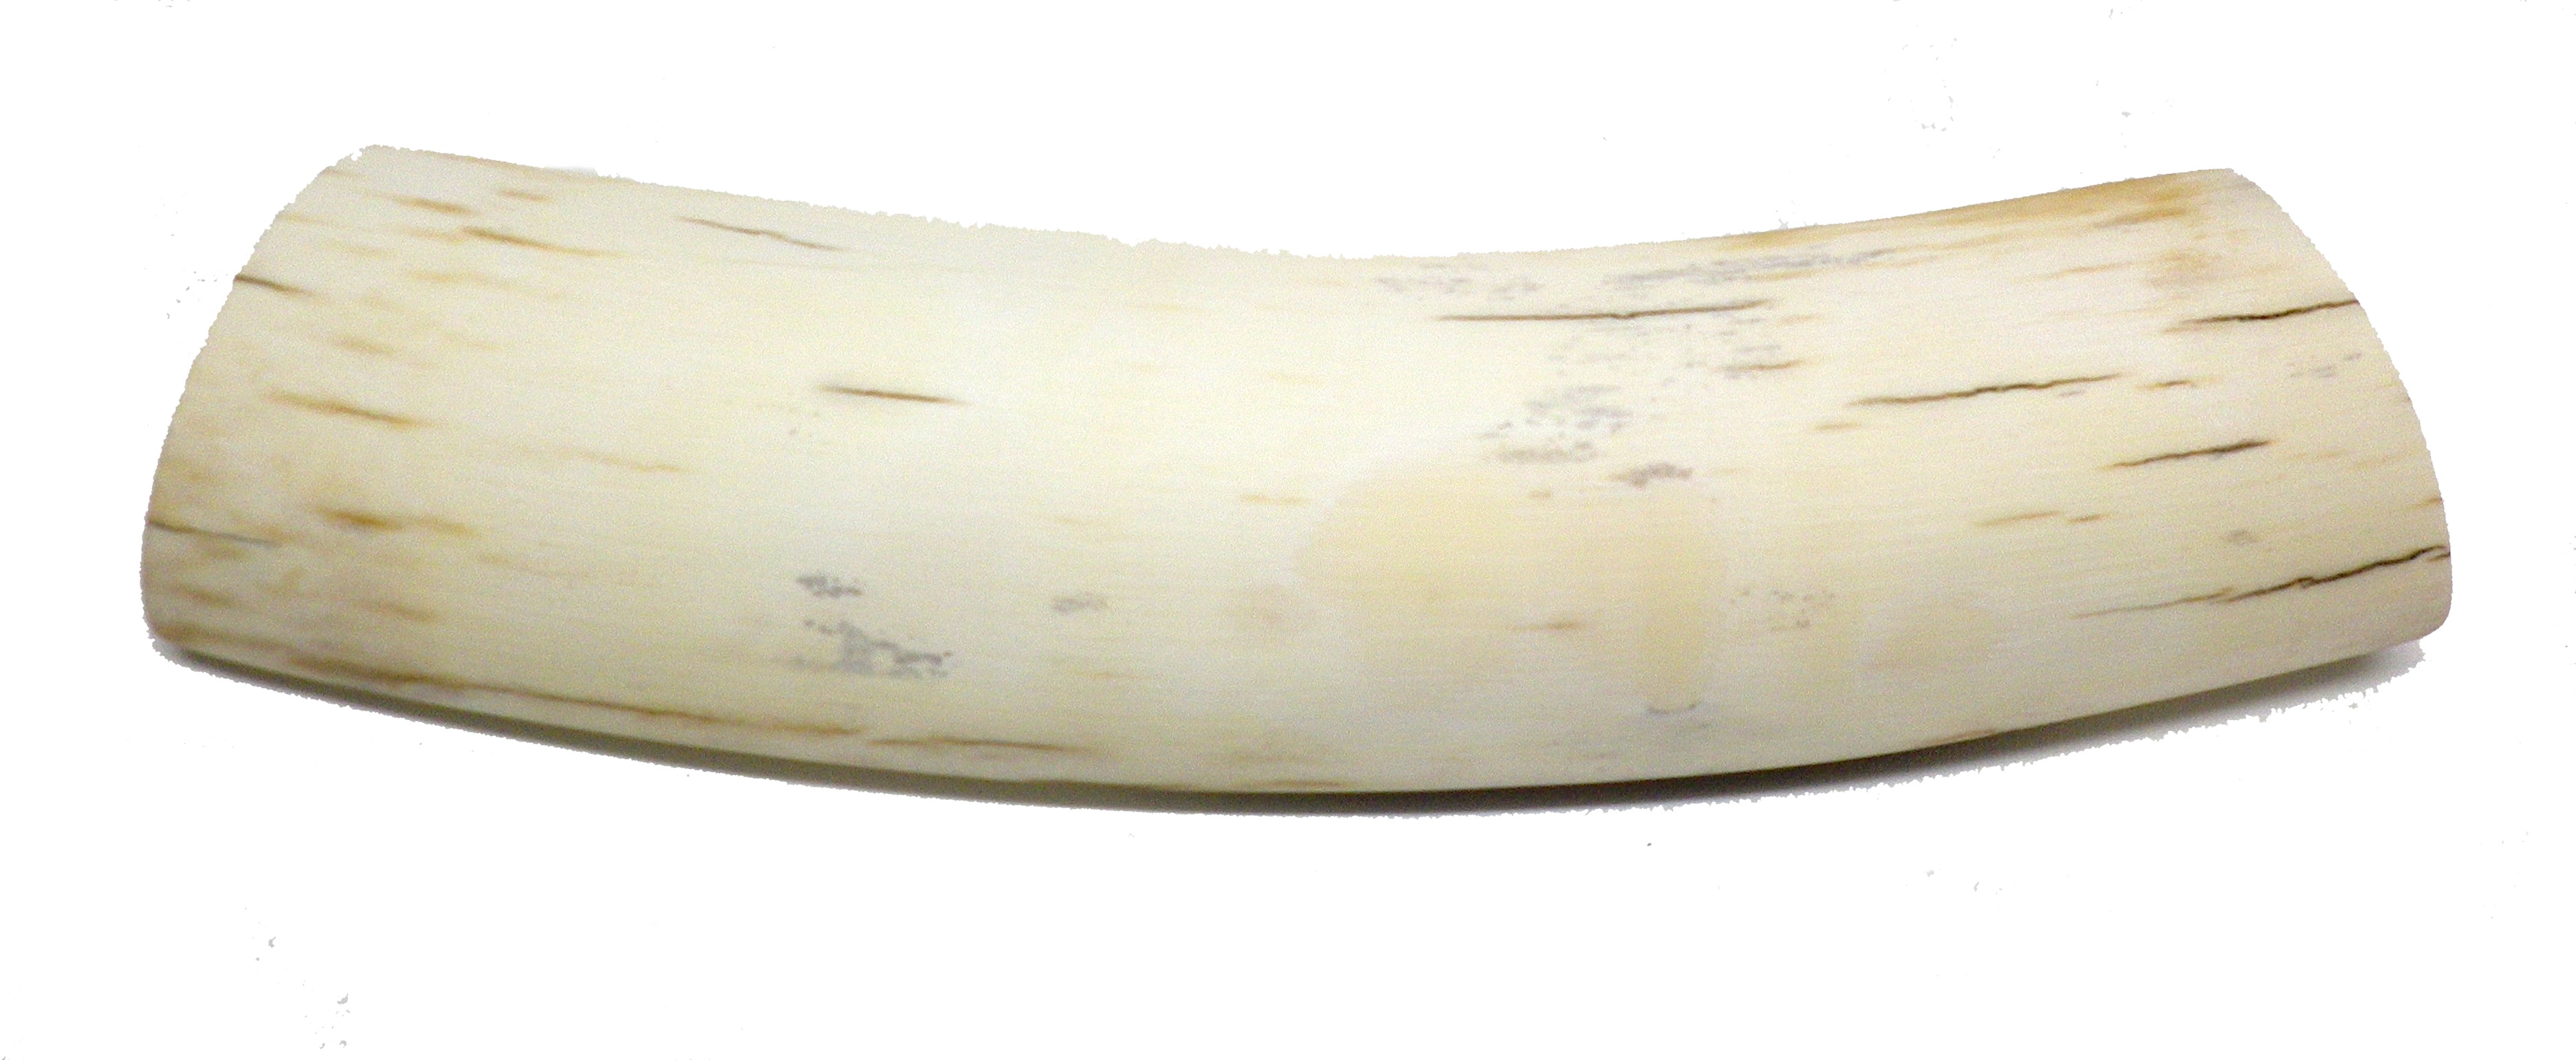
Sanded Mammoth Ivory for Tuna Scrimshaw
To start with the entire surfaces had to be sand blasted and the darkest blue oil paint applyed. This has taken about 2 hours.
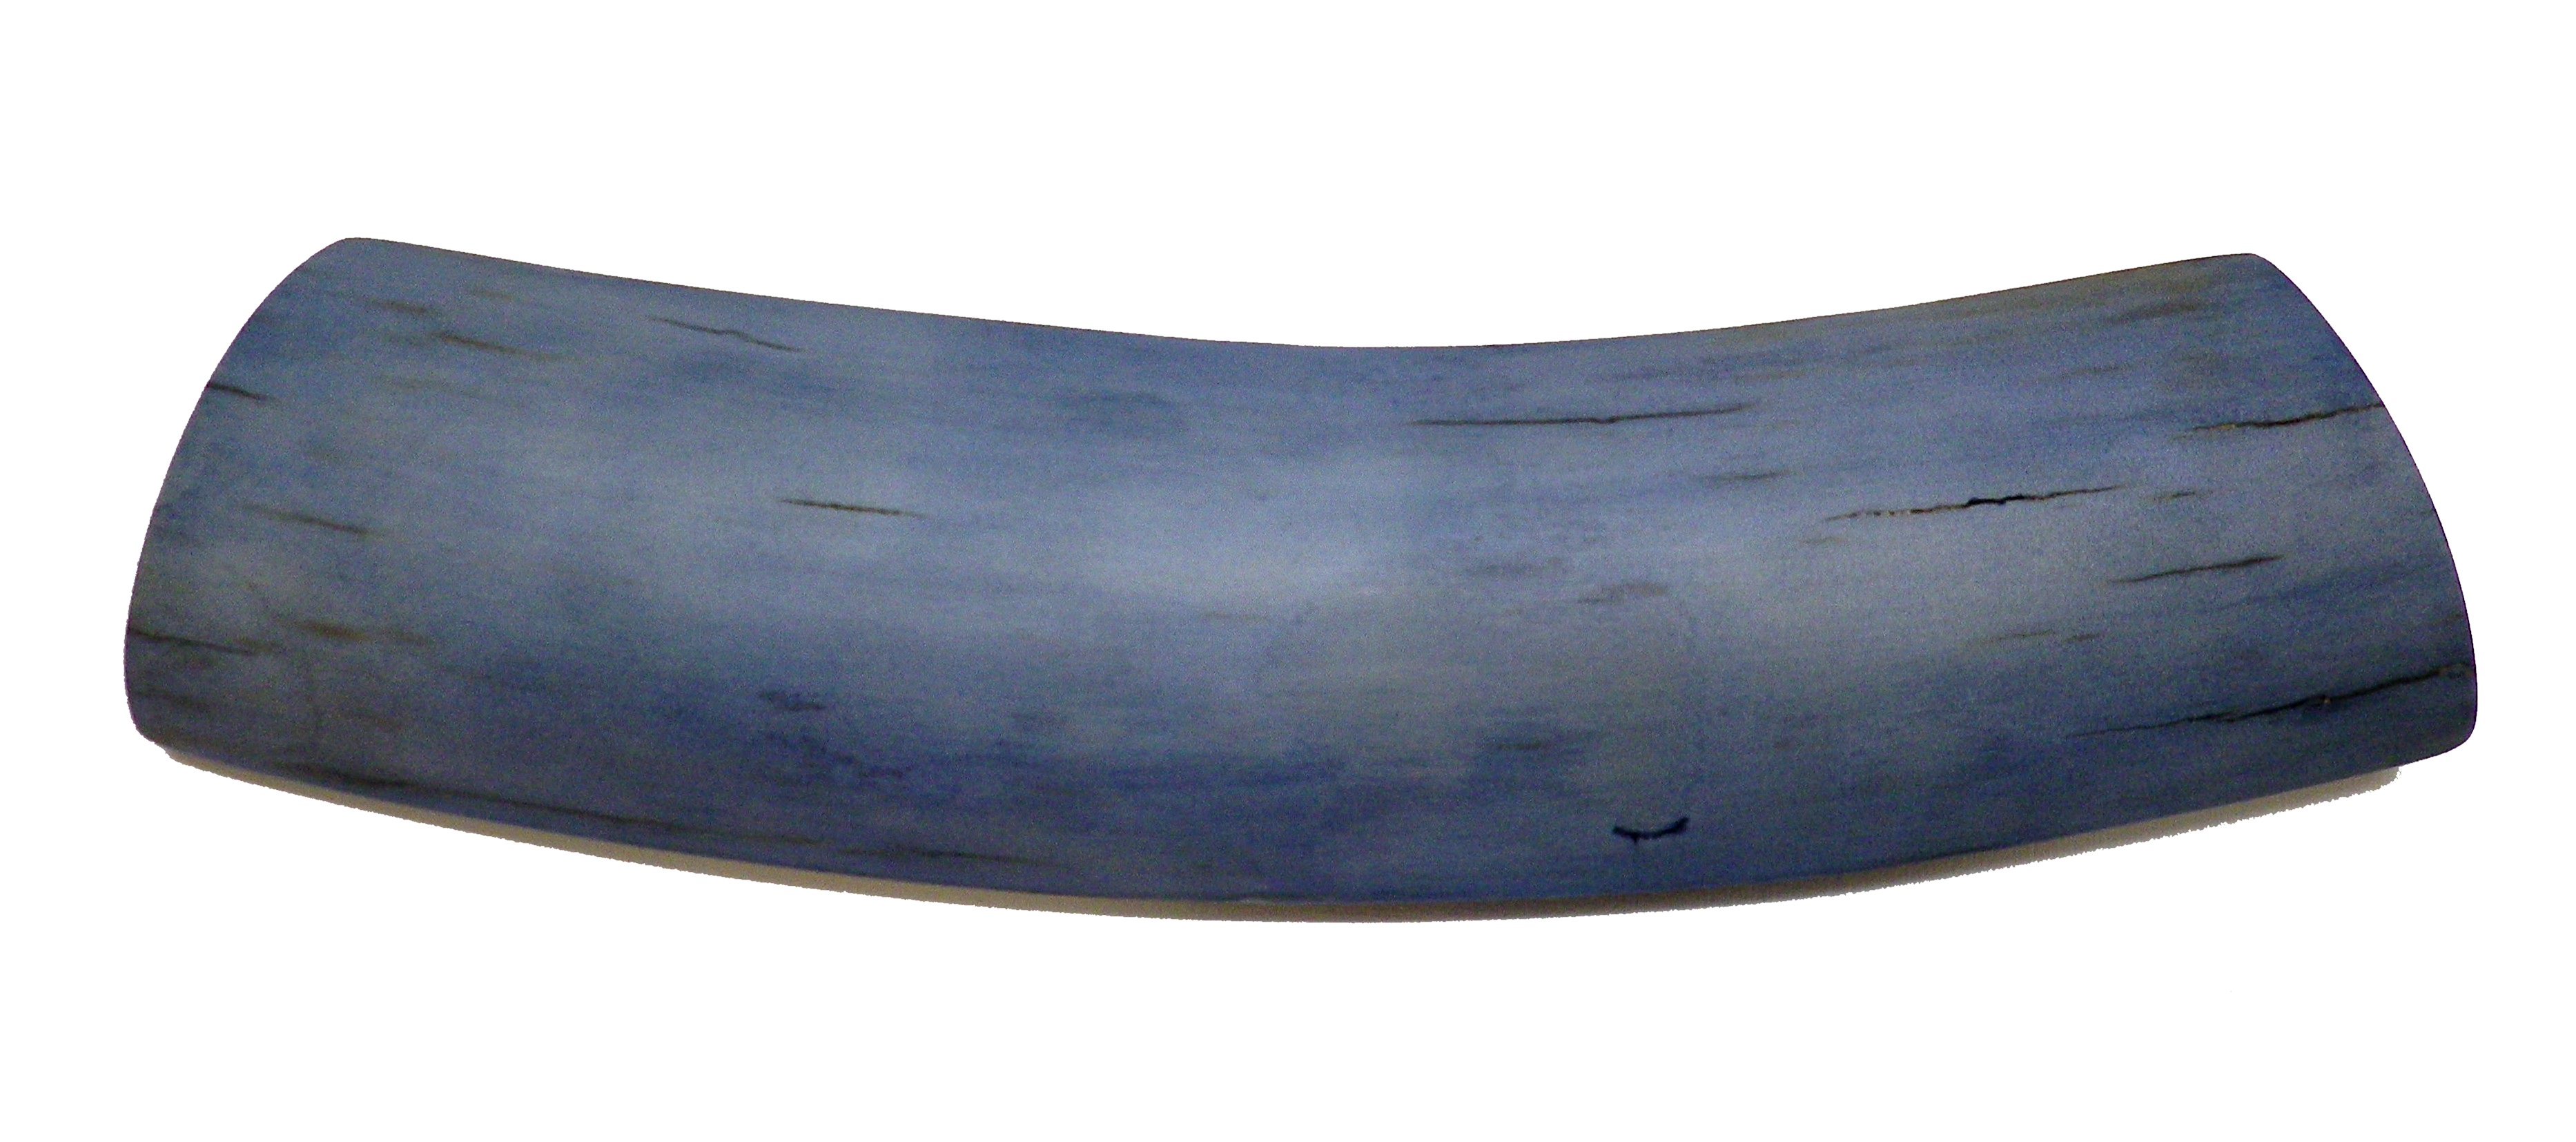
Sand Blasted and Coloured Mammoth Ivory for Tuna Scrimshaw
Next the tuna picture was attach to the ivory and the outline cut plus some of the features. It now looks like a simple scrimshaw, but the entire background will have to be heavily stippled to get the intense blue. The rest of the detail will be done by hand.

Step 1: Tuna Scrimshaw Basic Outline Scratched
6 hours later and the highlights are beginning to show on the tuna bodies.
This is a shortcut used in conjunction with sand blasting. Before the oil paint dries completely a tooth pick is used to rub away the paint where the white of the ivory is to show through. This must be done while the paint is still wet because after a couple of days the paint won’t come out of the sandblasted surface. The edge of a scalpel will be used to scrape away more paint to bring out the intense white at the end of the process to make it shimmer like silver.

Step 1: Tuna Scrimshaw Basic Outline and White Areas Scratched
Tuna Scrimshaw Step 2 – 26/5/15
18 hours later the dark deep blue under the tuna is done. The needle in the stippling machine had to be constantly sharpened because the ivory is inconsistently hard/soft. The stippling has to be done completely then the paint applied all at once to get a uniform colour. Because ivory is inconsistently solid, the paint goes on unevenly, strong in some spots and weak in others, but that’s to be expected in a scrimshaw of this size.
Step 2: Tuna Scrimshaw Bottom Coloured
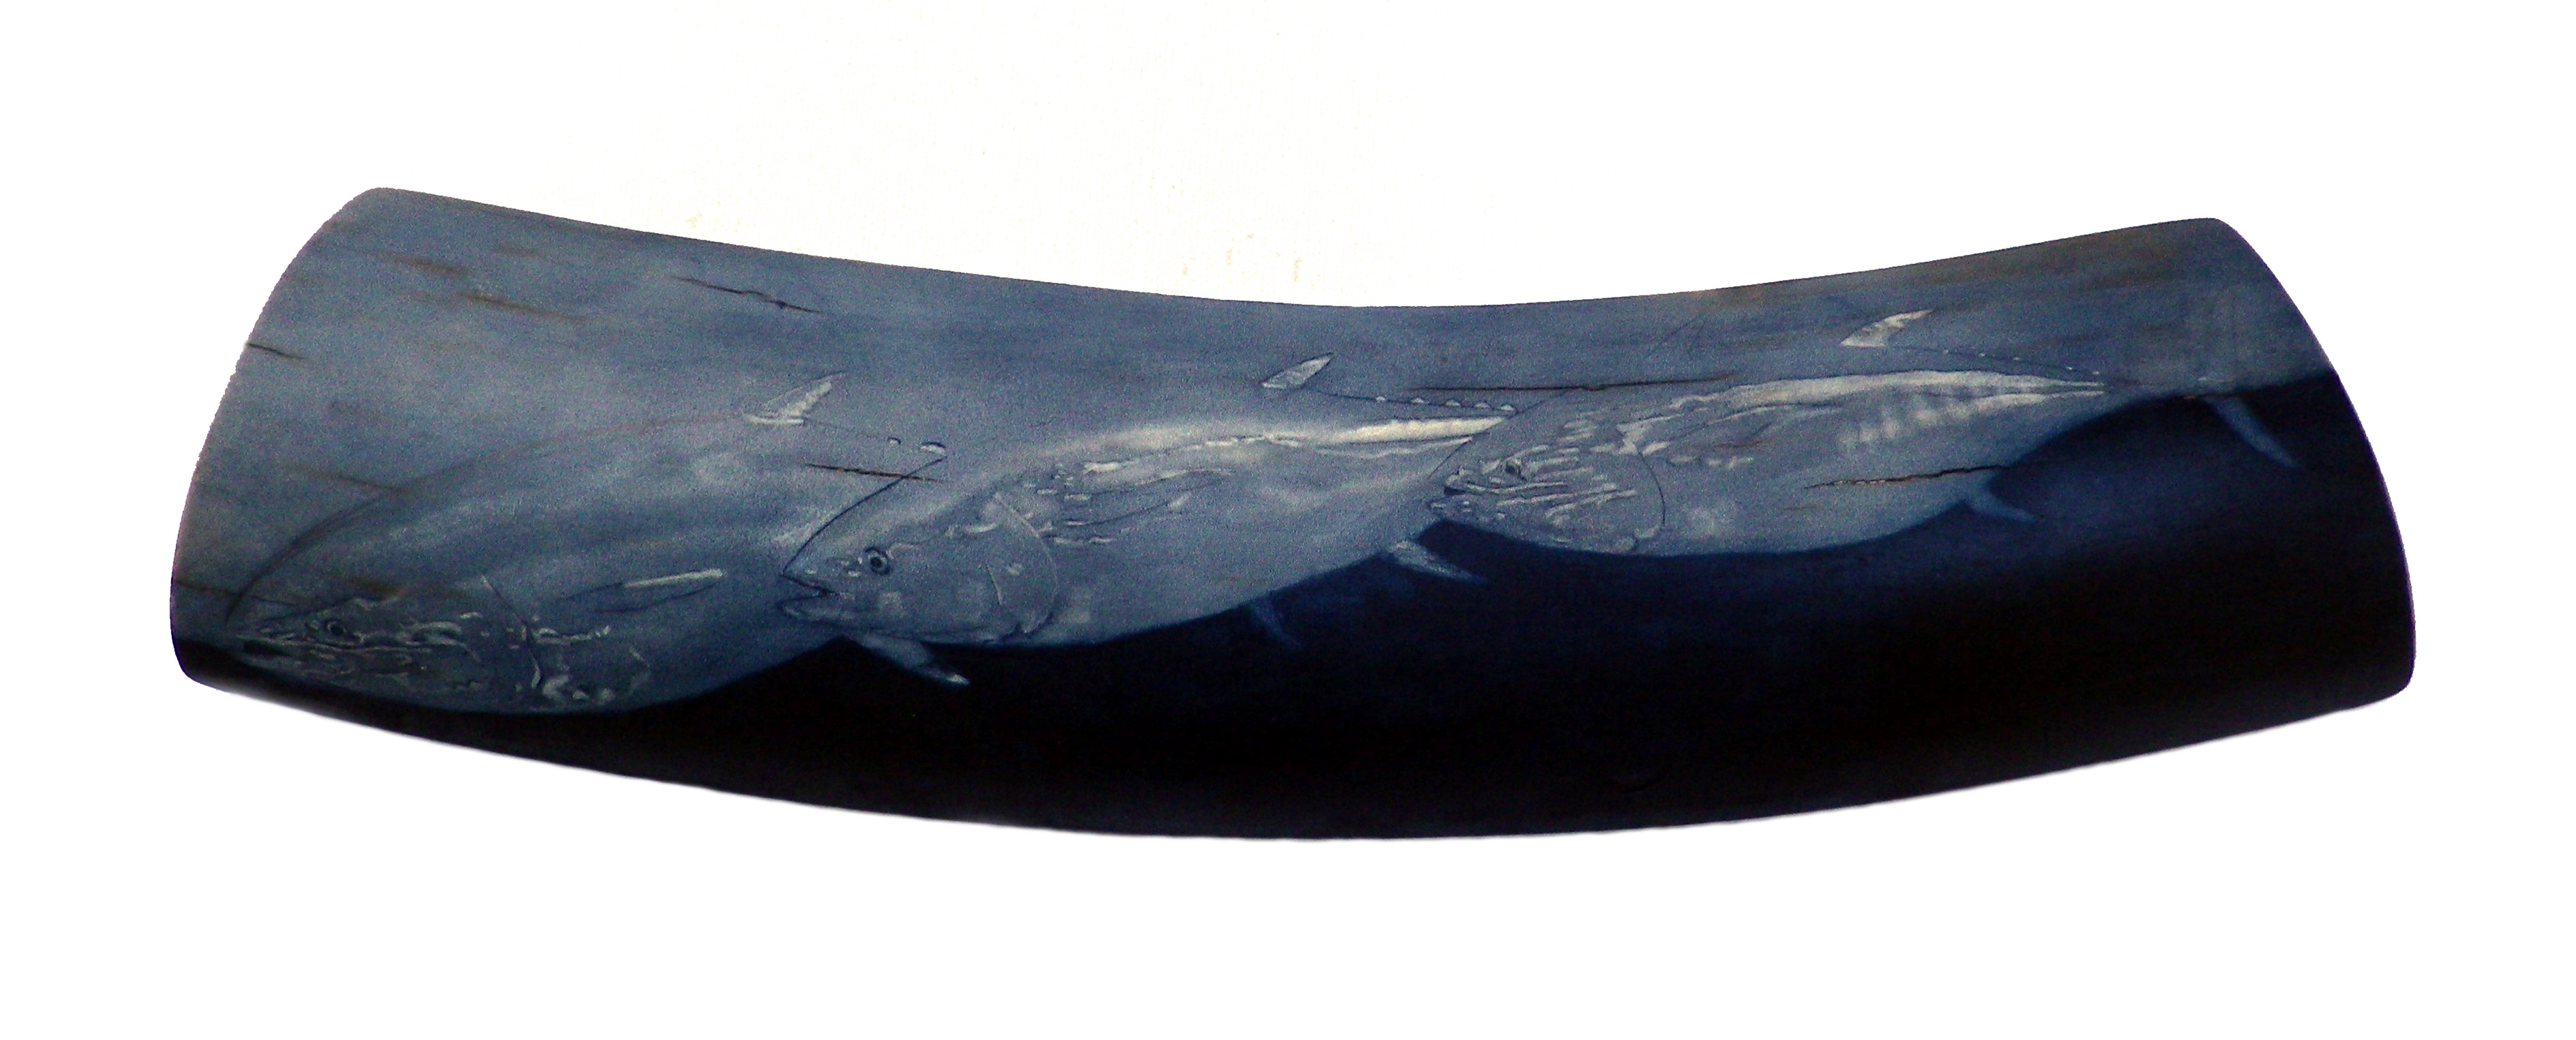
Tuna Scrimshaw Step 3 – 1/6/15
15 hours later the deep blue above the tuna is done. Next comes the finer details of the tuna – this is the enjoyable part. Even though the tuna look simple there are a lot of fine details. The background seems very dark and I might have overdone it; time will tell if the silver shimmer makes the tuna stand out. It’s at this point that I begin to have doubts about how the finished product will look.
Step 3: Tuna Scrimshaw Background Finished
Tuna Scrimshaw Step 4 – 5/6/15
9 hours later and the first tuna is fully scrimshawed (I’ll have to touch it up when the others are finished). This is the hardest Mammoth ivory to work with, it doesn’t stipple easily and chews up if worked too much, if the dark blue is rubbed off to make adjustment it leaves a nasty dirty black colour. This is only my 9th colour scrimshaw so it’s still experimental but I still hope it turns out alright, especially after spending 33 hours on the background. Time to scrimshaw the next tuna.
Step 4: Tuna Scrimshaw First Tuna Finished
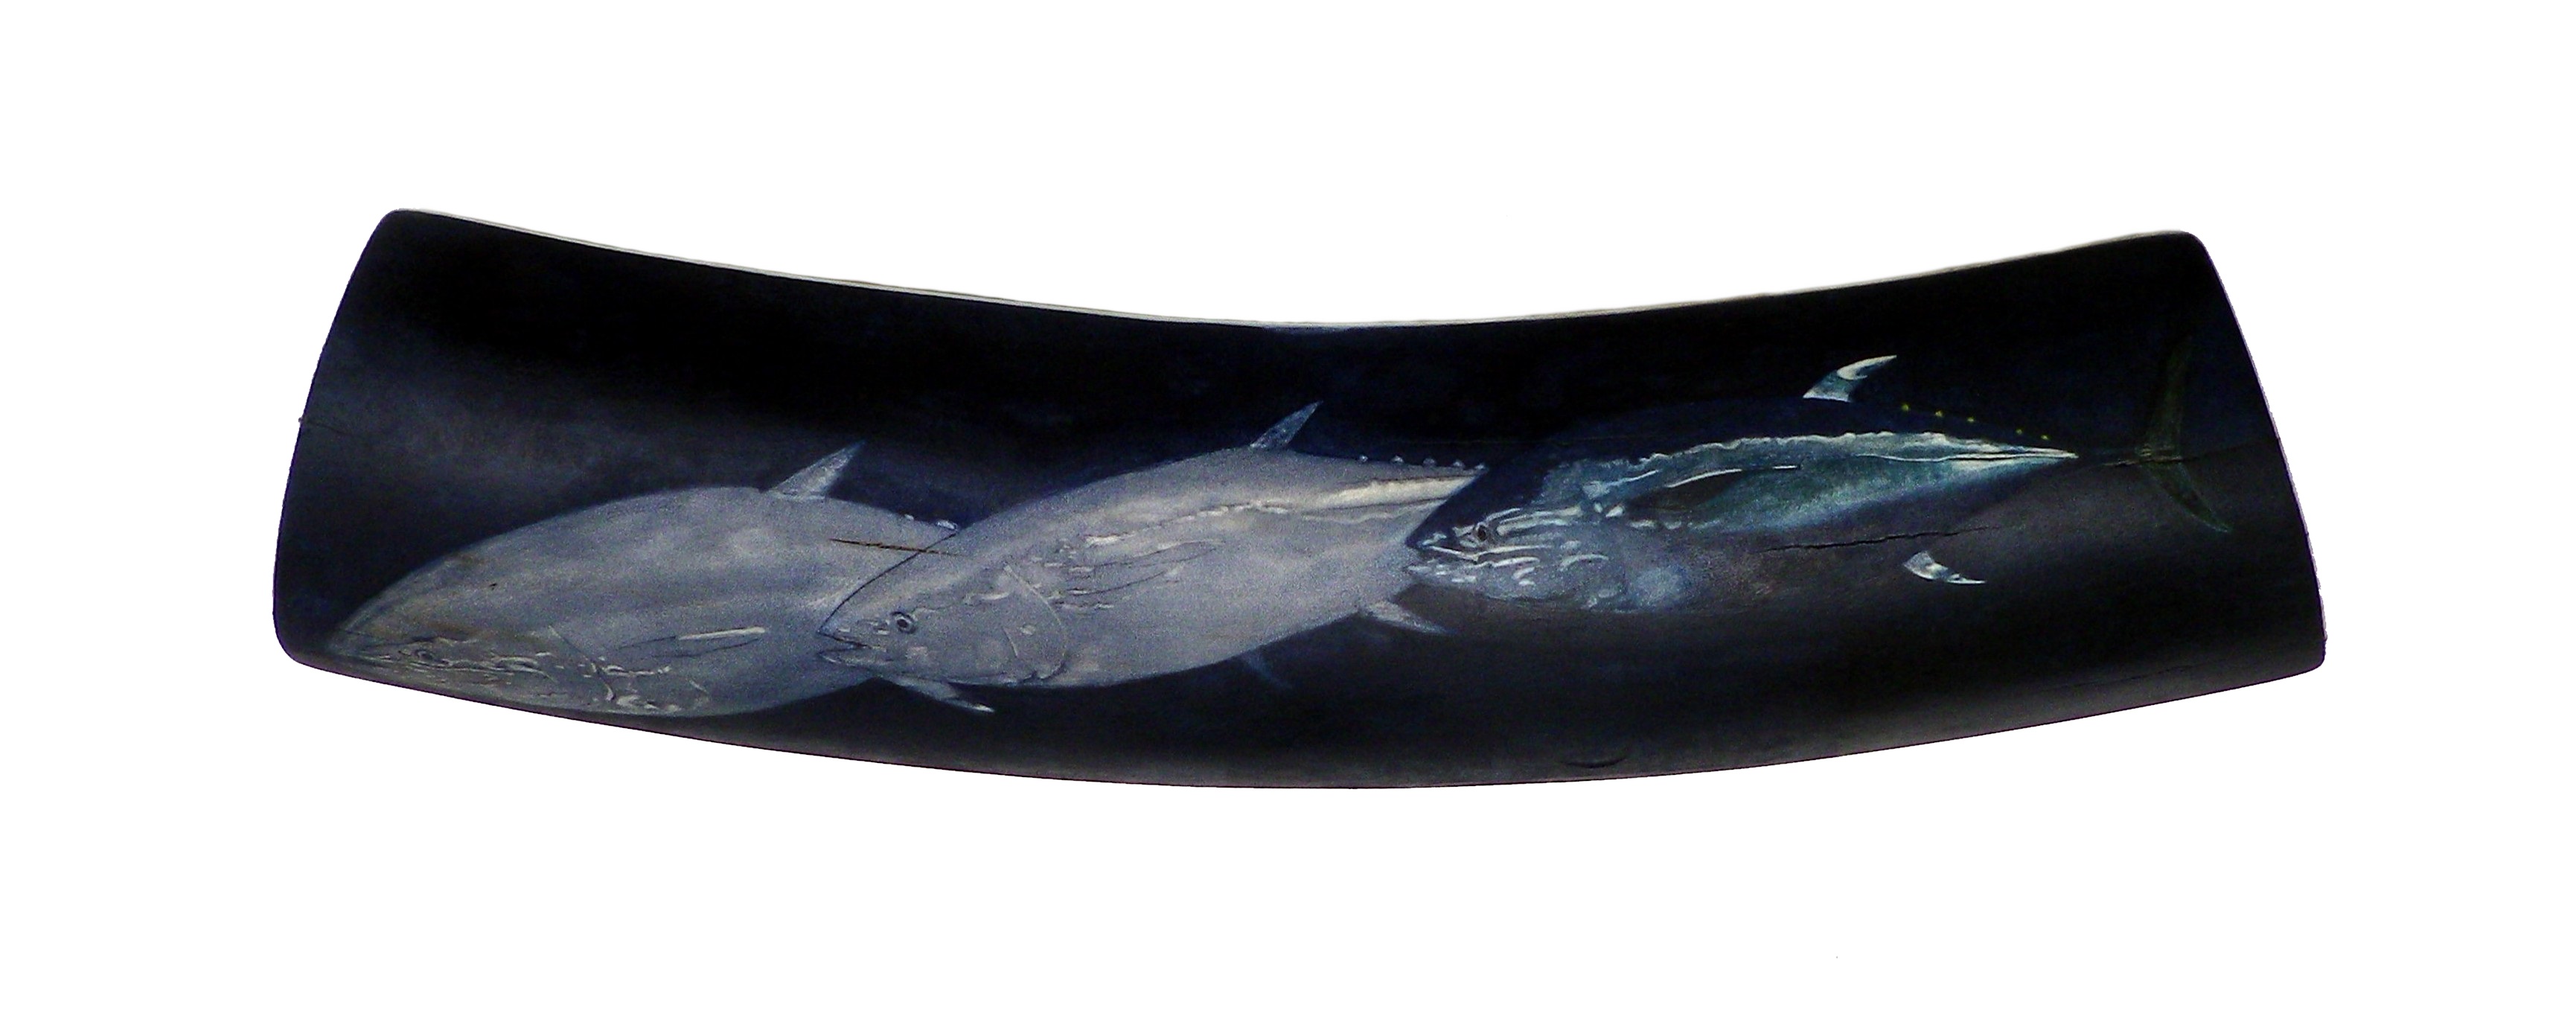
Tuna Scrimshaw Step 5 – 7/6/15
9 hours later and the 2nd tuna is fully scrimshawed. This one was a bit easier because I’m starting to get used to the ivory and subject. Concentrating on one tuna at a time makes it hard to get the colours the same and when all three are finished they’ll have to be adjusted to look similar.

Step 5: Tuna Scrimshaw First and Second Tuna Finished
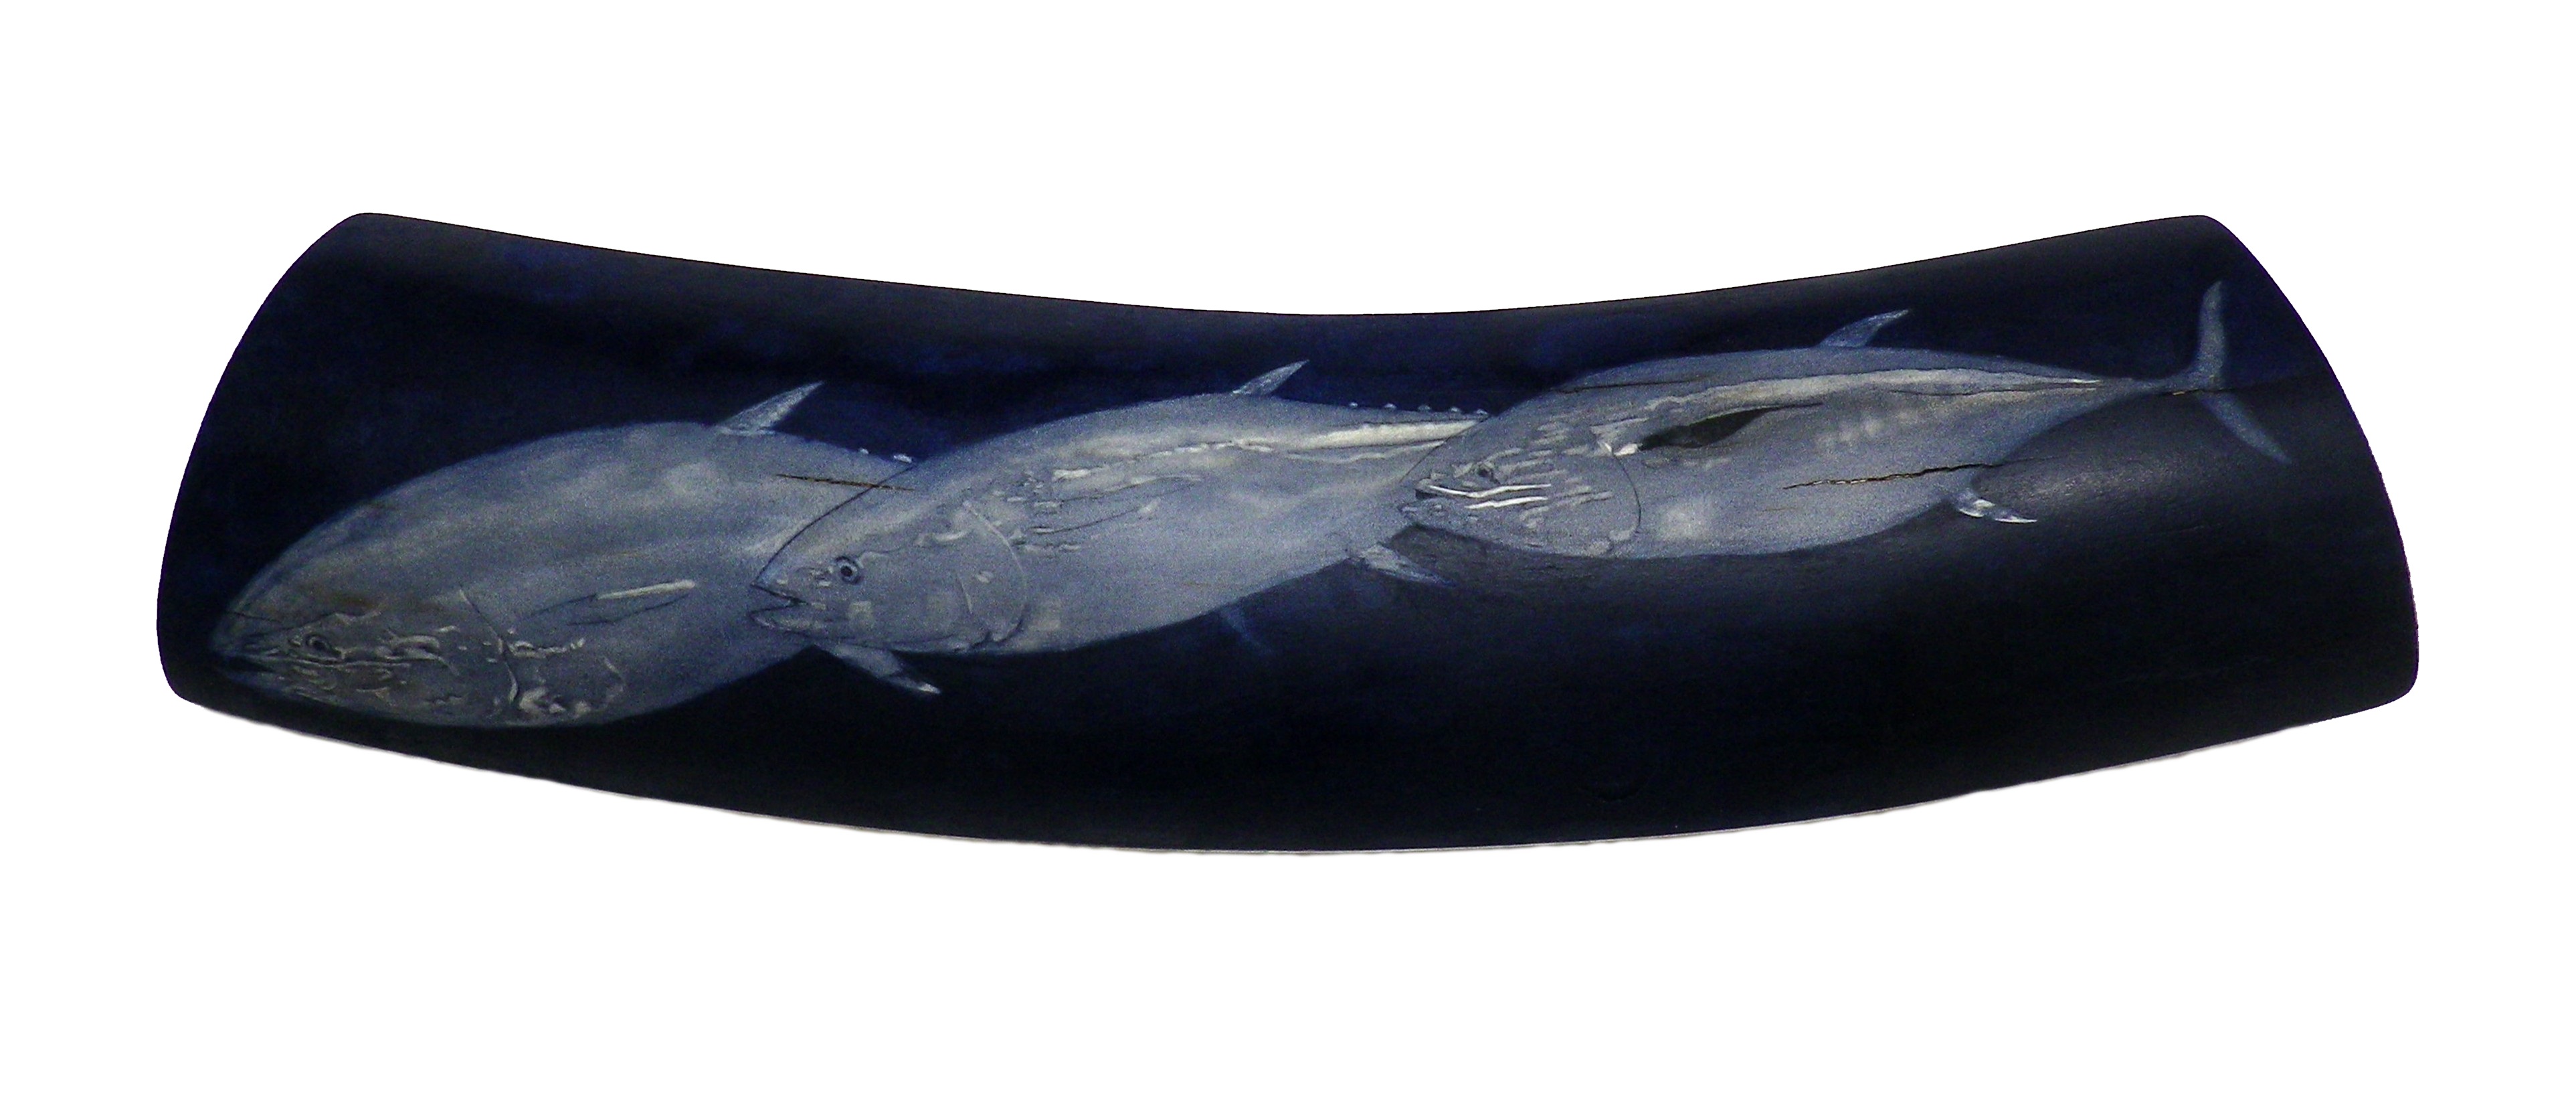
Tuna Scrimshaw Step 6 – 8/6/15
8 hours later and the final tuna is finished. Looking at it as a completed scrimshaw, I can see what went wrong. The background is too dark and the tuna get lost in it. I’ll try to lighten it up. Next comes the stand.
Step 6: Tuna Scrimshaw All Tuna Finished
Total time to complete 65hours.
Base/ Stand
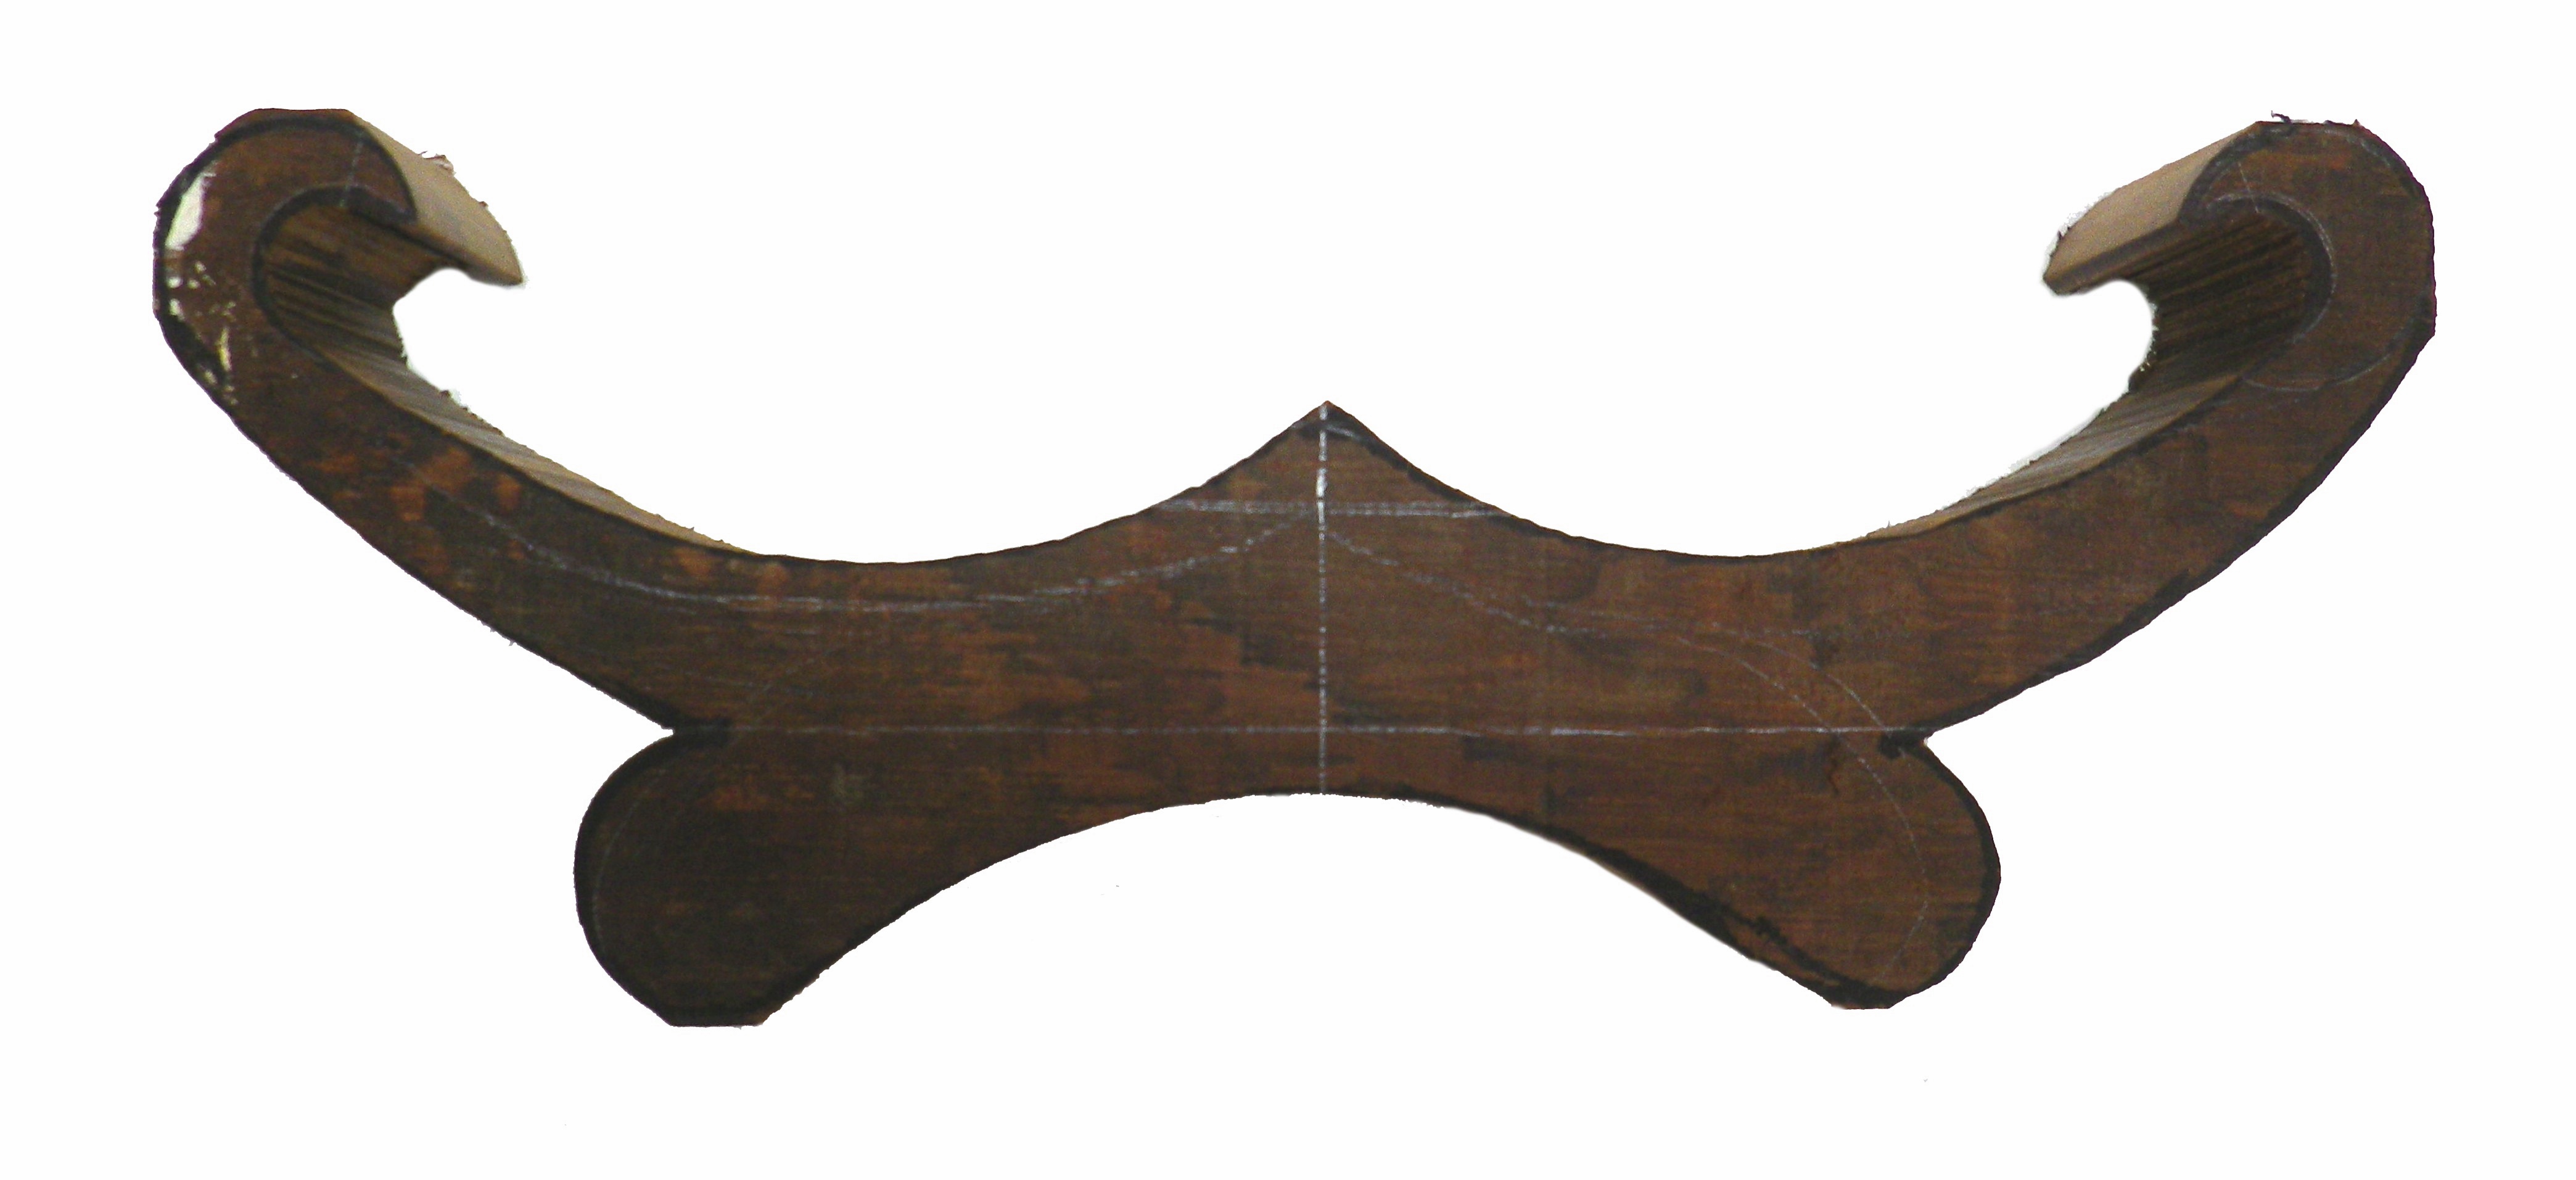
Not sure what this wood is, got it from the off cuts bin at the local lumber yard. It’s 40cm long x 15cm high and 5cm thick. First the outline is drawn onto the wood.
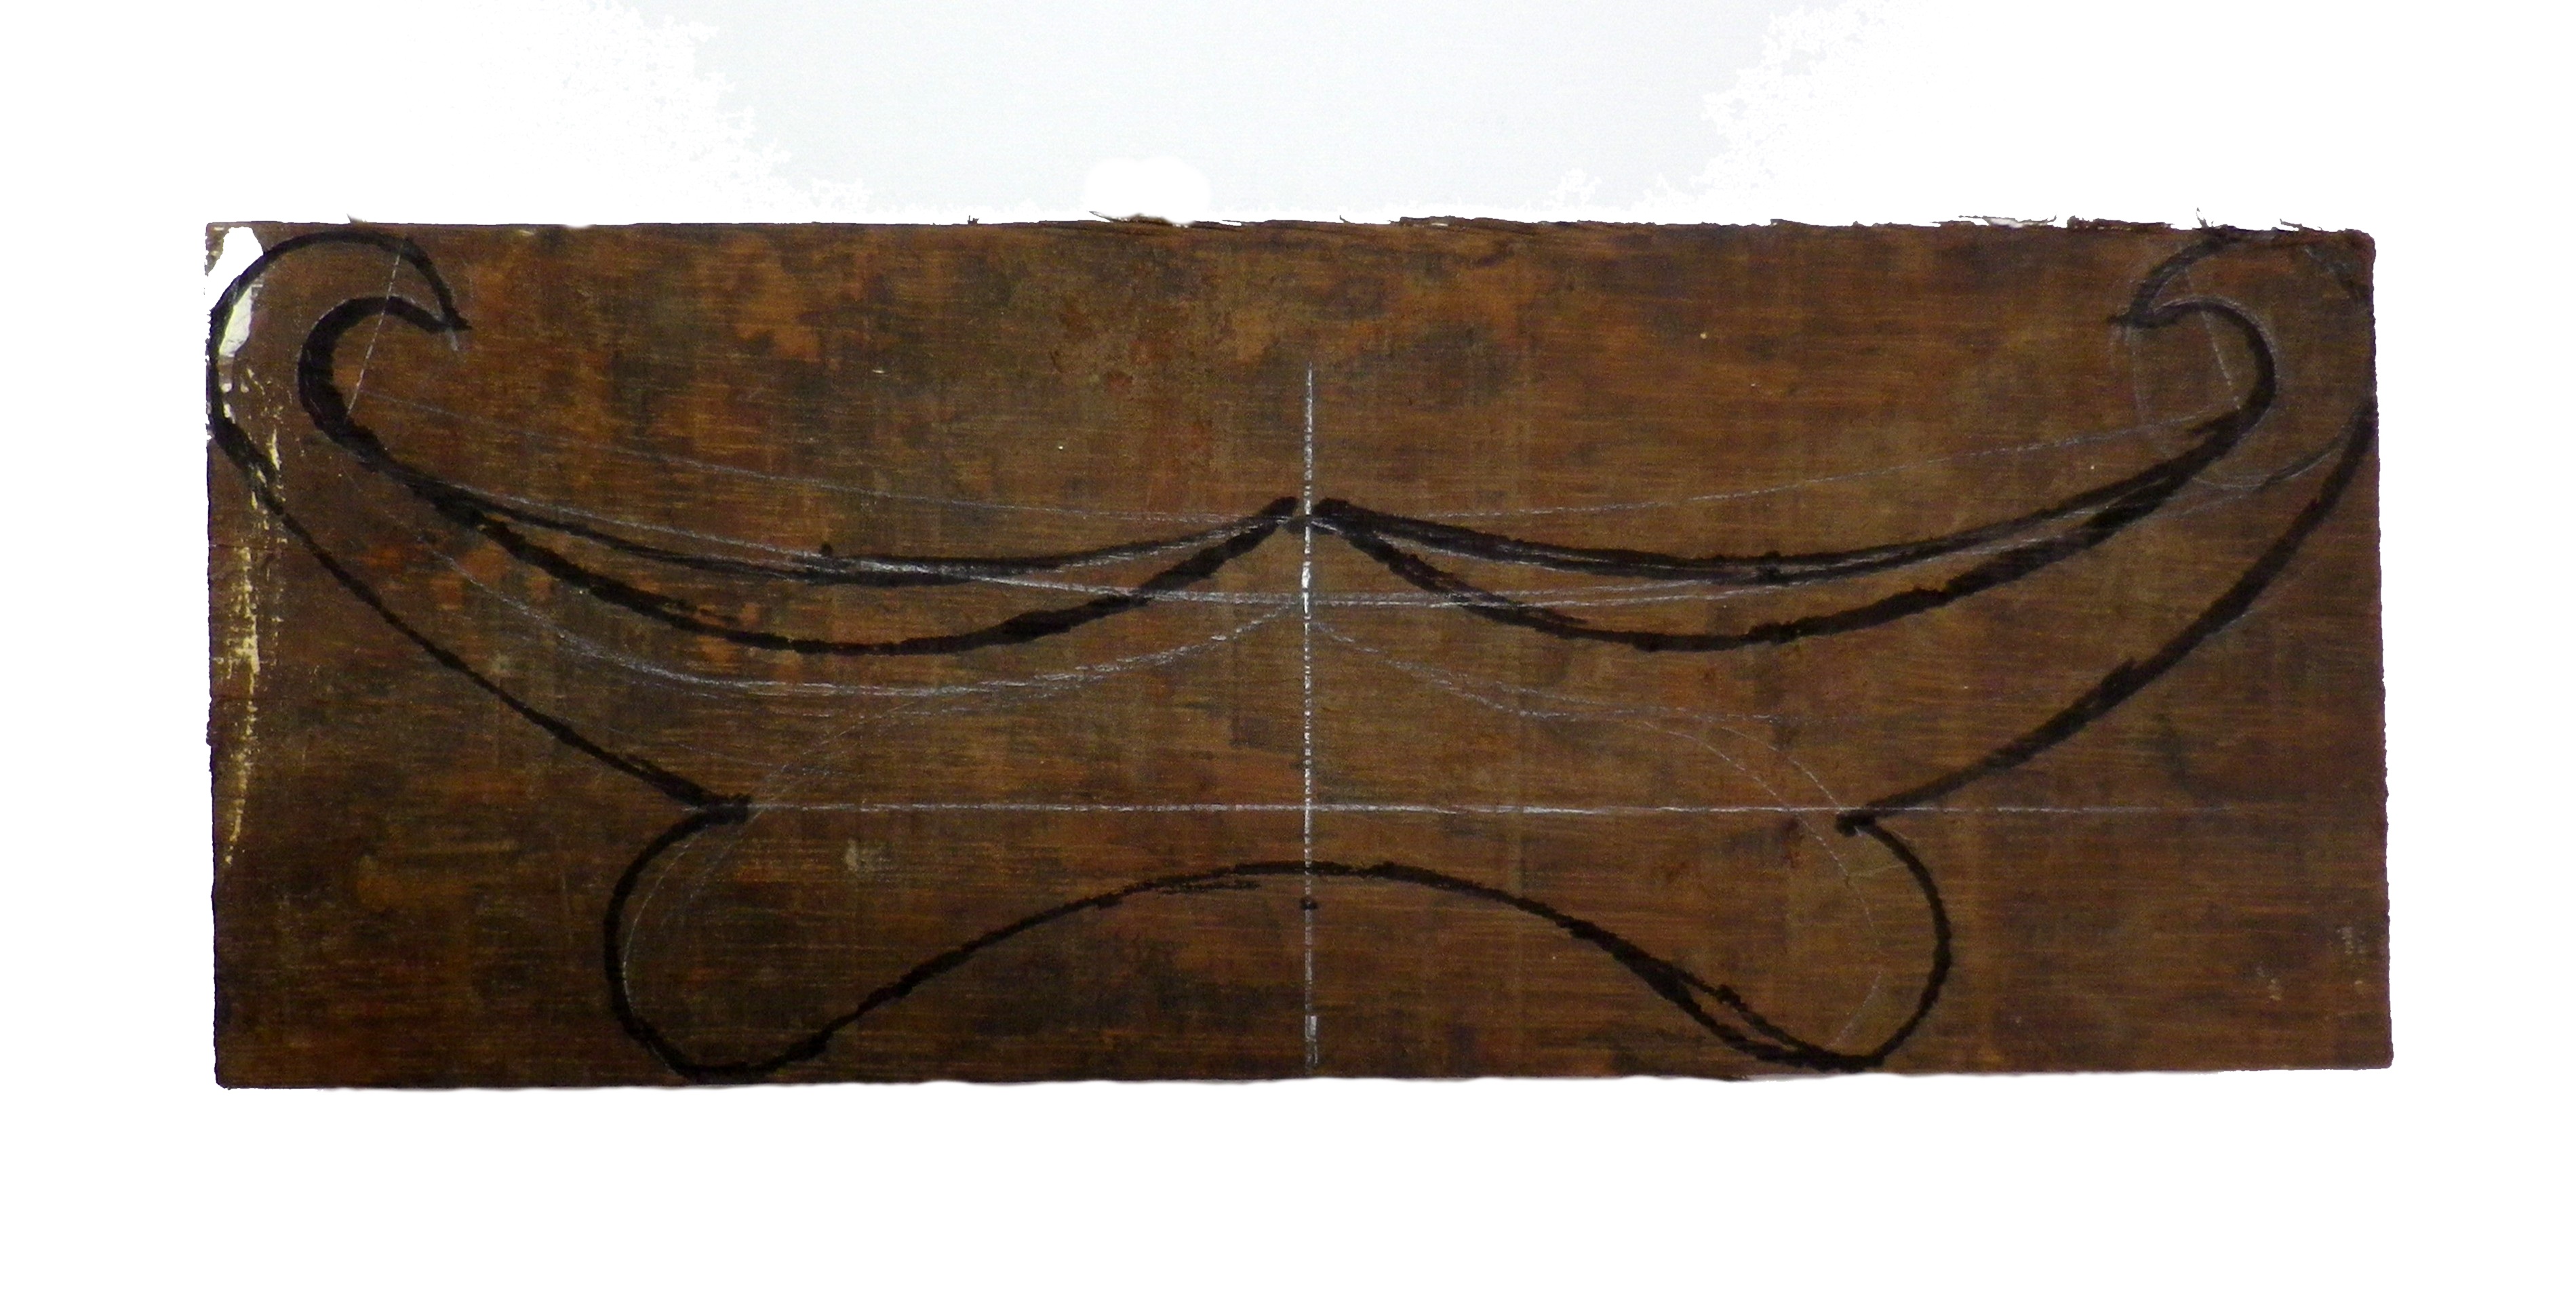
Wood With Outline for Tuna Scrimshaw Base
Next it’s cut out using a band saw. The closer you cut this to the shape of the finished piece, the easier it will be to sand and finish. This wood is very hard and will be quite difficult to hand file and sand.
Roughly Cut Wood for Tuna Scrimshaw Base
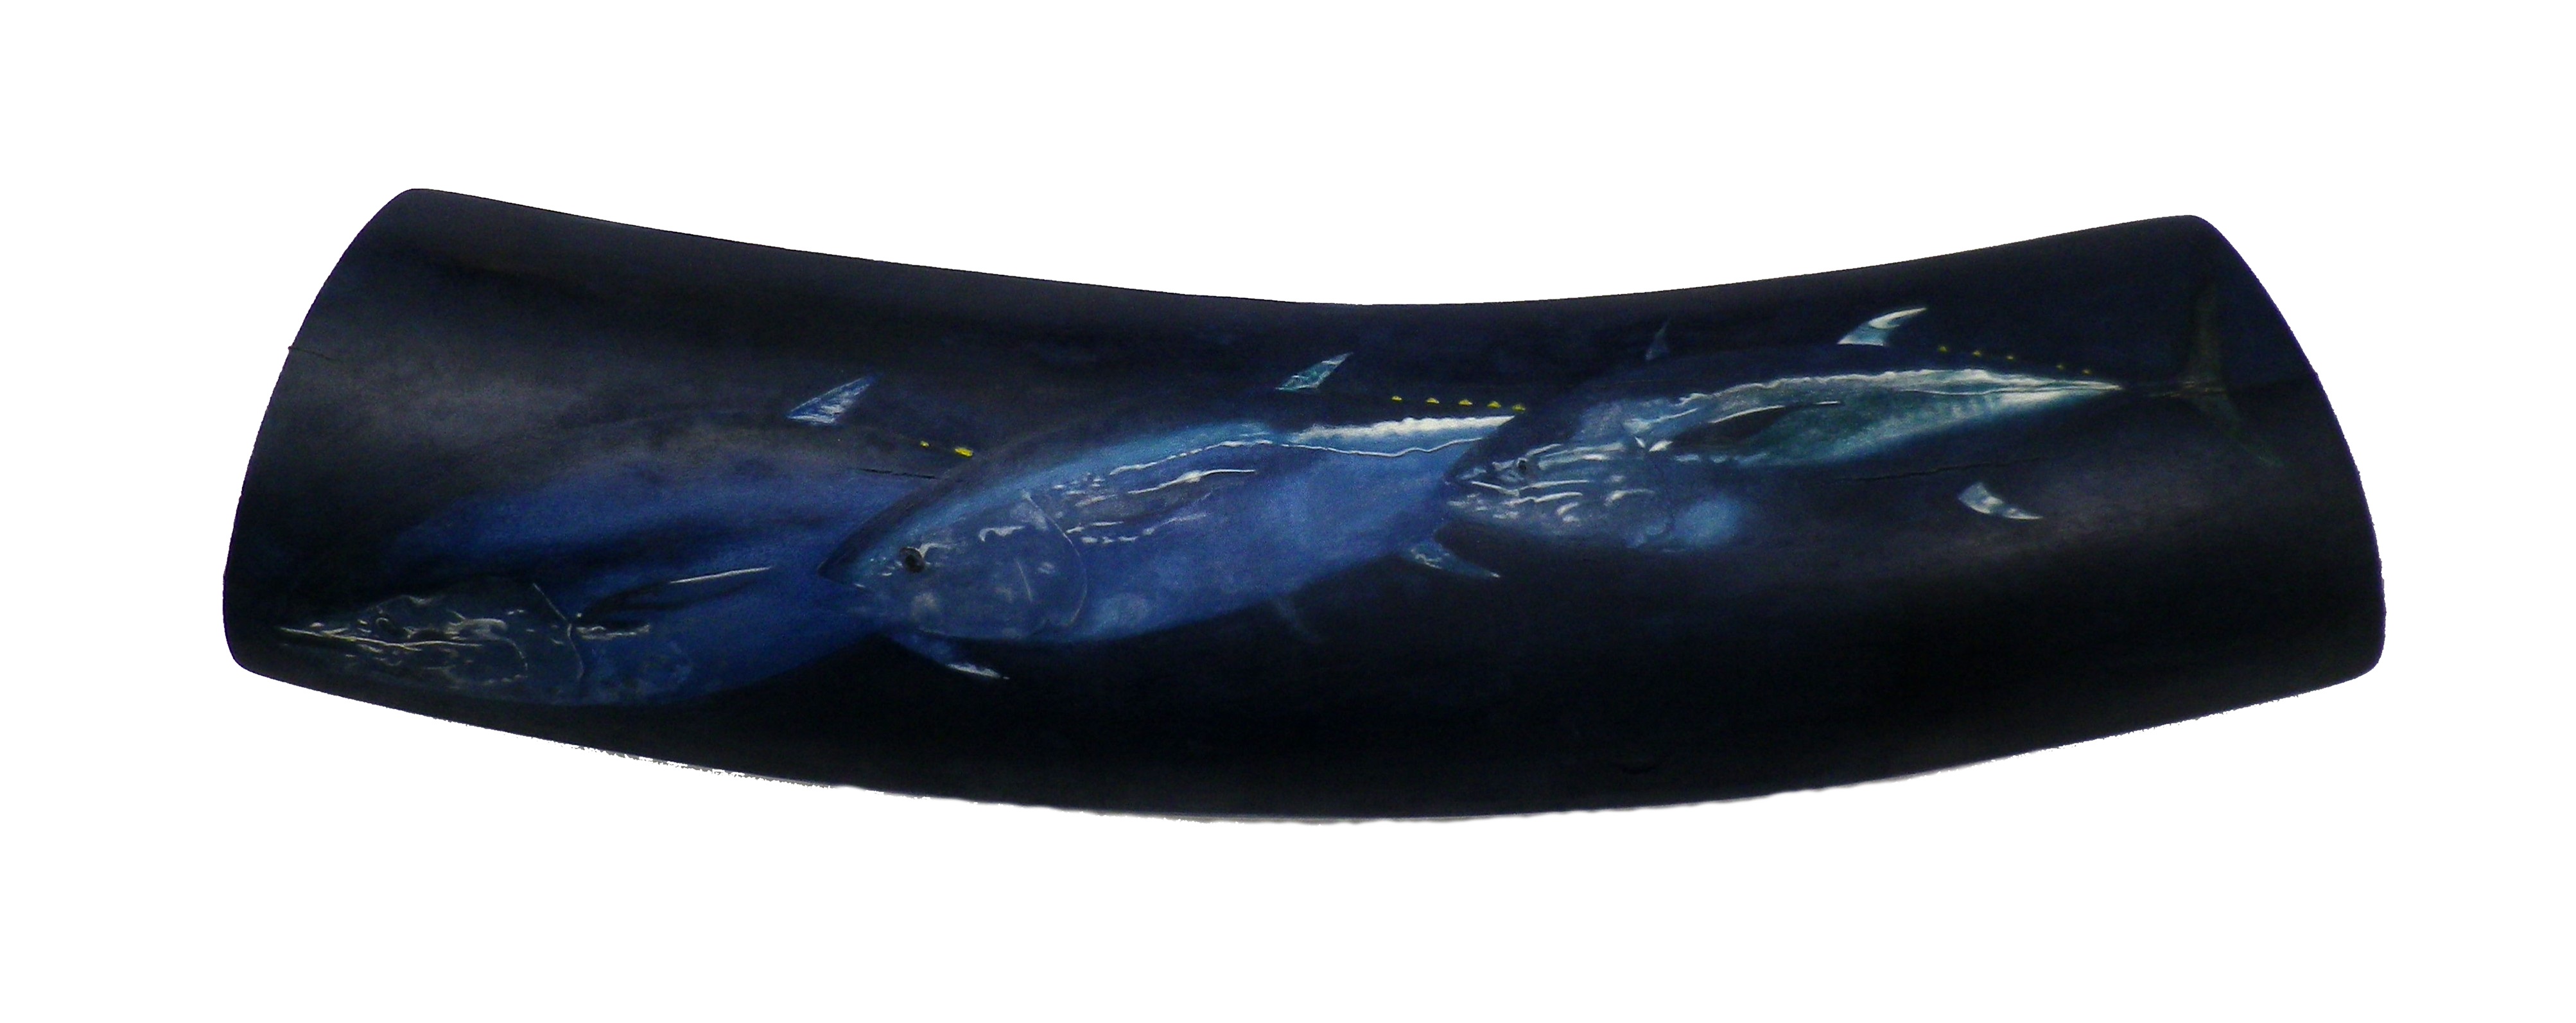
Next, the notches that hold the ivory in place are cut. It takes a lot of fiddling around to get this part just right (make sure you wear a dust mask or respirator when filing and sanding the wood). Next I used 40 grit then 600 grit sanding on the bench grinder (same as the stand for the tiger scrimshaw “Wild and Wet”). Last, the name plate, same as the name plate on “Wild and Wet”. I was able to lighten the background a bit so it looks OK.
The entire stand took 8 hours.
Tuna Scrimshaw – “Bluefin Tuna”
The End.
Contact Rod: randclacey@bigpond.com

You must be logged in to post a comment.